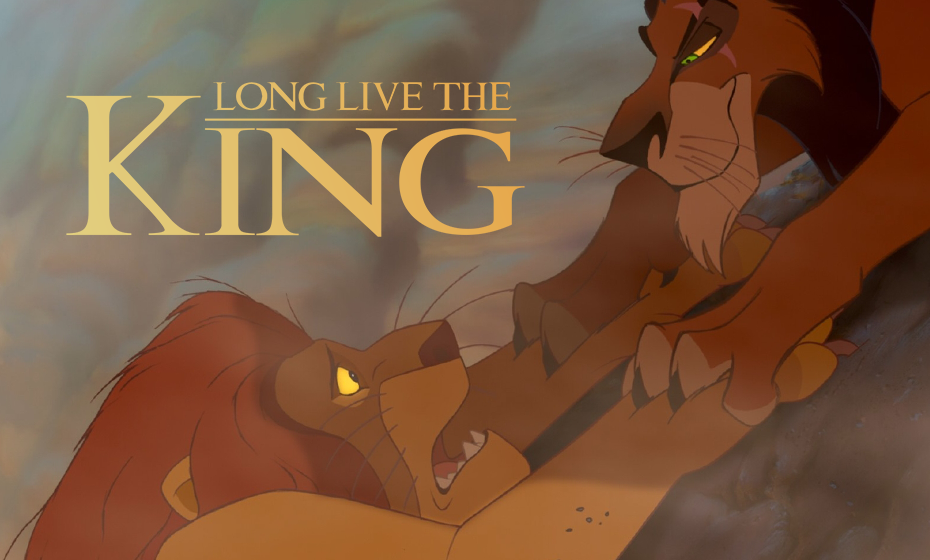
06.20.23
LONG LIVE THE KING: ORGANIZING CHAOS IN THE LION KING’S STAMPEDE SCENE
In the past 50 years, few films in either the live action or animated genres have made as much of a cultural imprint as the 1994 animated musical from Disney, THE LION KING. Directed by animation veterans Rob Minkoff and Roger Allers, The Lion King was the second highest grossing movie of all time upon its release, won two Academy Awards, was the first Disney film dubbed into Zulu, and in 2016 was selected for preservation in the US National Film Registry by the Library of Congress.
The Lion King marks the commercial and cultural apex of what is today known as the “Disney Renaissance”, a revival of animated films from the studio that brought a new era of artistry and technology and pushed children’s films into the mainstream. To celebrate the 100th anniversary of Disney and their animated films, we will take a deep dive into The Lion King’s iconic stampede scene, breaking down how the chaos and drama was built frame-by-frame into one of the most memorable sequences in the history of animated cinema.
THE DISNEY RENAISSANCE & THE LION KING
The “Disney Renaissance” marks a period of time from the late 1980s to the end of the 1990s, when animated films from the studio experienced a creative evolution in three key areas of craft. First was the animation, led by artists who were educated by Disney’s original story artists, referred to as the “Nine Old Men”. Animators such as Glen Keane led a revival of Disney’s style, leading to films such as The Little Mermaid and Beauty and the Beast, which were worldwide sensations. The second key trait was the pivot of Disney’s animated films to all being Broadway-style musicals, with the central characters singing to express their internal emotions to the audience. Disney animated films prior to this period obviously had musical numbers, but the extent to which these musician numbers served as the structural backbone of the films was greatly increased during this time. Third was the technological innovations of the time, which allowed computer-generated effects to be incorporated into Disney’s traditional hand-drawn cel animation style.
The Lion King was in production at the same time as Pocahontas, which was widely considered the safer and more prestigious bet by the studio. Most of Disney’s top-billed animators worked on Pocahontas, leaving The Lion King a second-priority project. Nevertheless, the making of the film involved a huge production team and effort. Animators studied animal movements at the Miami MetroZoo, the crew visited and filmed national parks in Kenya with wider lenses than the telephoto lenses often used to film wildlife documentaries to get inside the action, and the creative team studied films such as Lawrence of Arabia to create a sense of epic scale in their compositions.
The stampede sequence itself took over 2 years to animate, with five specially trained animators and technicians working to create the sequence using Feature Animation’s Computer Generated Imagery technology and Disney’s own CAPS (Computer Animated Production System). The computer technology was used as an addendum to the drawings rather than a replacement, allowing the production team to create thousands of wildebeests that moved independently, rather than relying on the animators to hand-draw each and every one of them. By relying on the work of the animators to closely study the animals behavior and replicate it in their drawings, supervising animator Ruben Aquino and CGI supervisor Scott Johnston were able to generate 3D representations of wildebeests that could be placed anywhere in the frame to allow for different camera angles over the course of the scene.
The Lion King’s stampede stands as perhaps the most memorable sequence in the film. Throughout the scene we are treated to periods of orchestrated chaos and extreme tension, punctuated by intense cathartic release. A premiere examples of storytelling rigor meeting technological advancements, here is how the stampede scene was constructed, shot for shot:
PART 1 – THE PLAN & THE ROAR
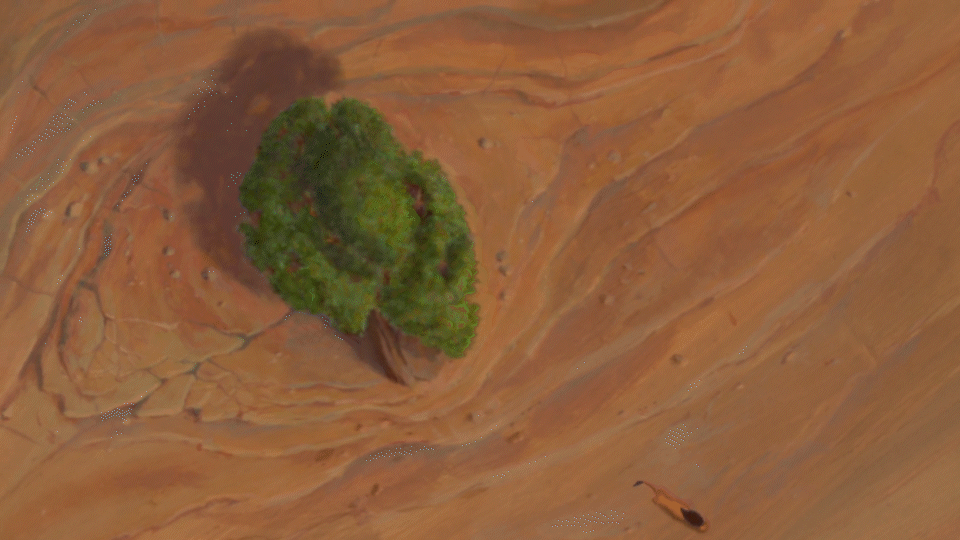
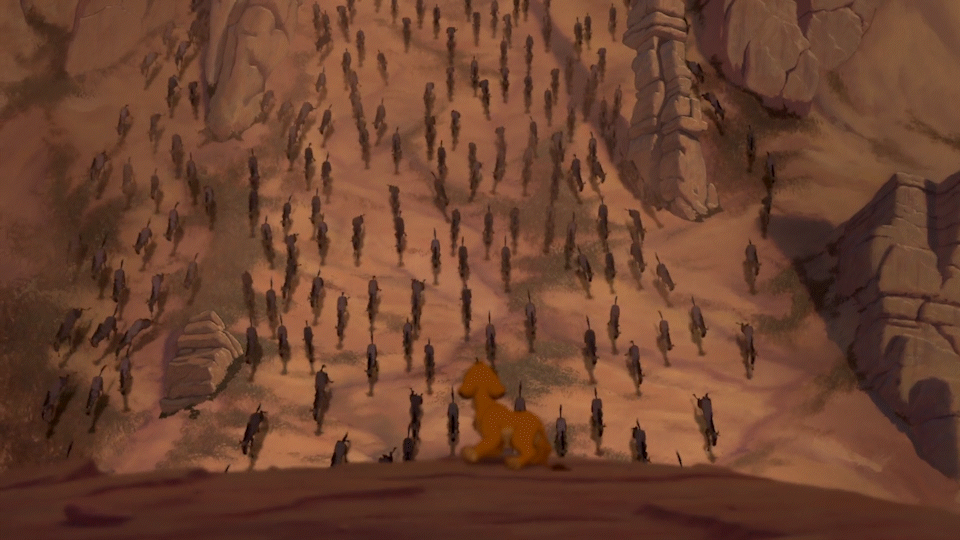
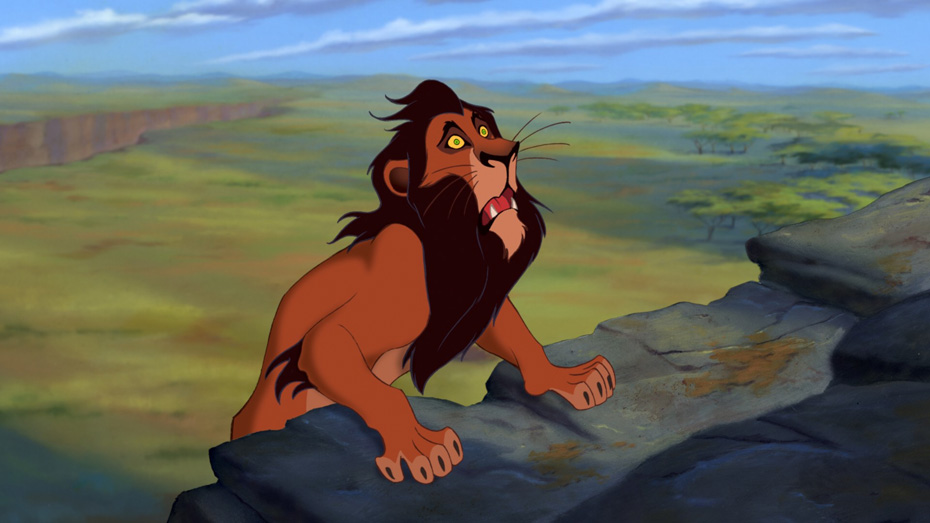
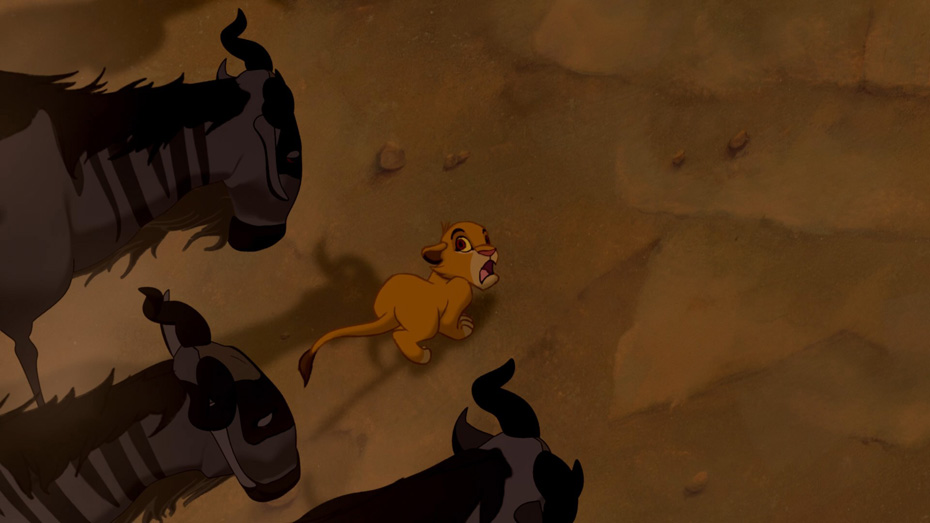
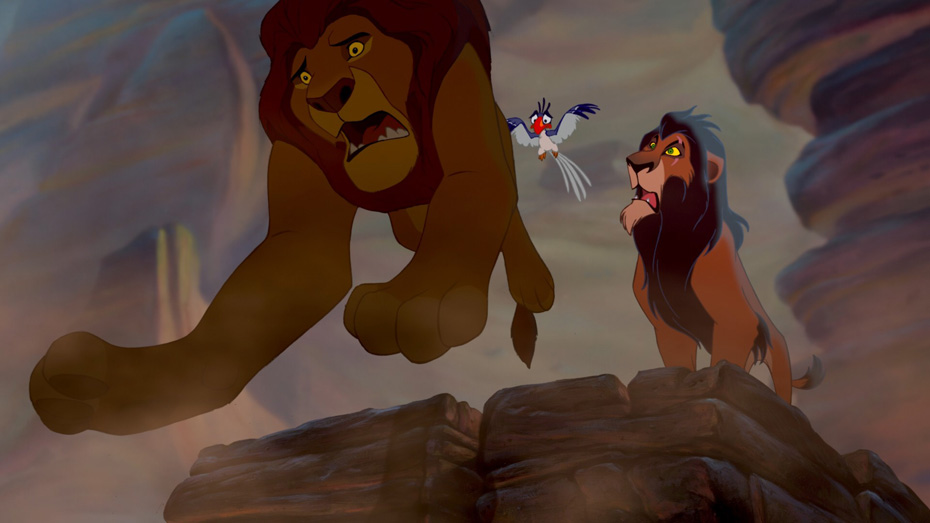
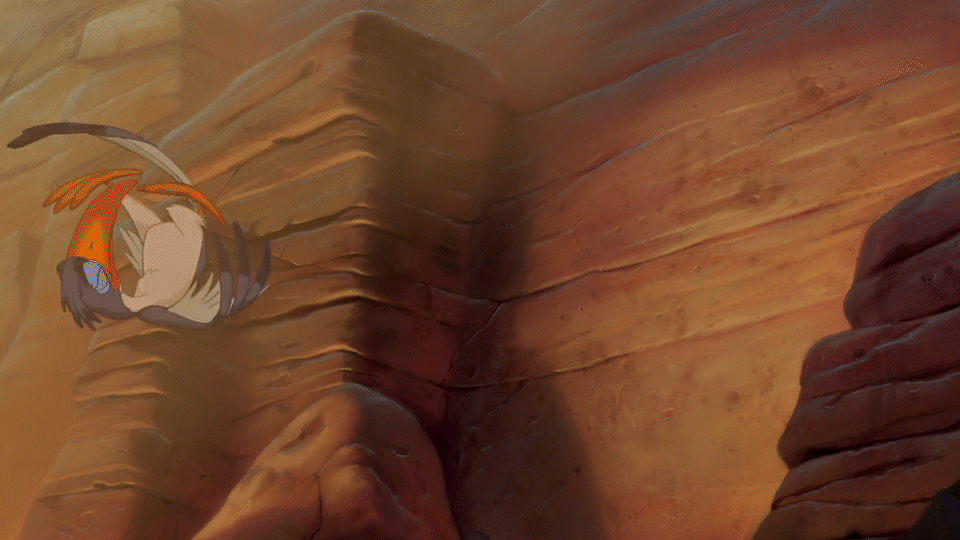
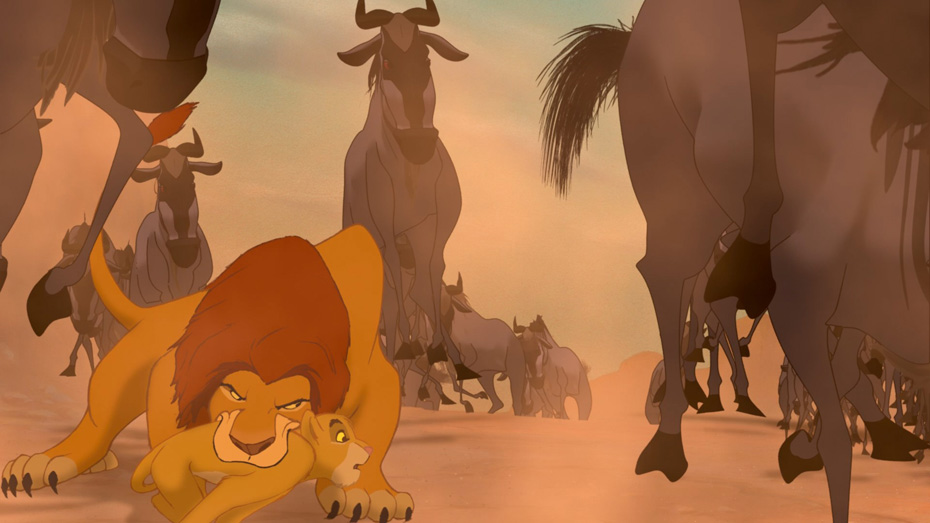
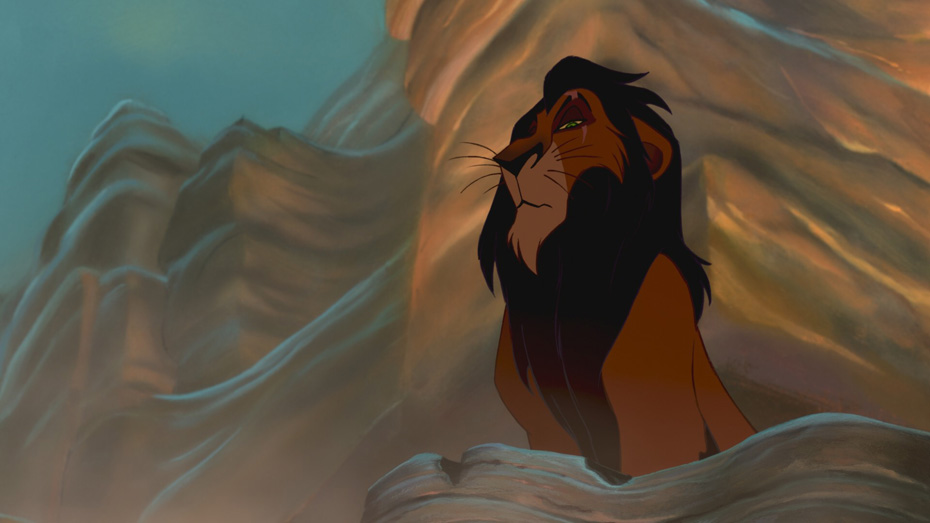
Shot 1: As Scar walks away from Simba, the wide overhead shot establishes us in an omniscient perspective, suggesting that we know something that Simba doesn’t…but what? The camera booms up and pans along the rock wall of the gorge, finally settling on a herd of grazing wildebeests. This shot establishes the relationship we will track throughout the scene – what is happening in the gorge, and what is happening above it.
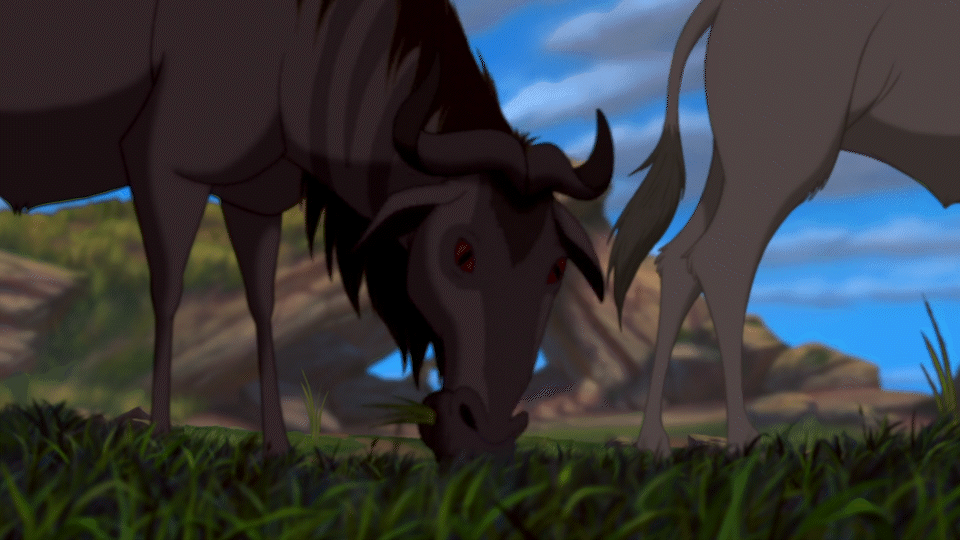
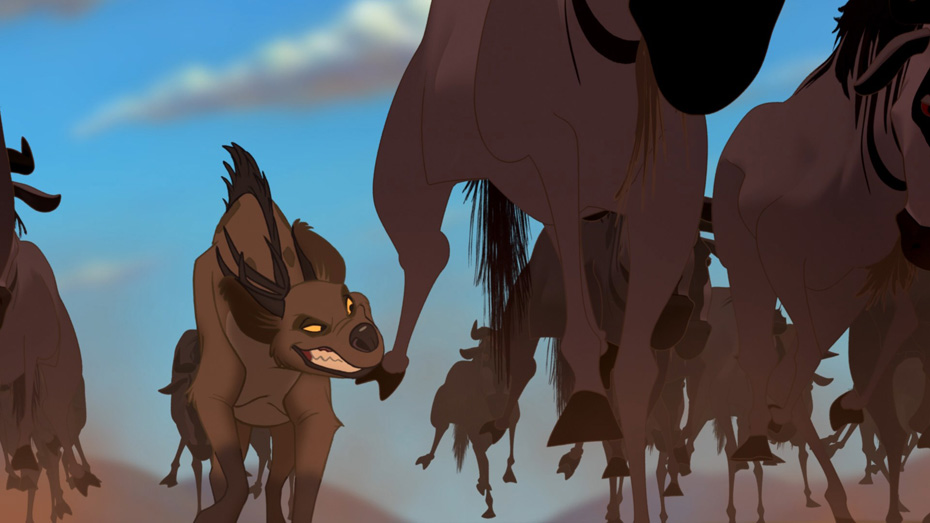
Shot 2: A close up shot of a wildebeest grazing pulls focus to the three hyenas watching in the distance, framed by the wildebeest’s legs and the rock formation they hide under. We anticipate how their plan with Scar involves the wildebeests.
Shot 3: A POV shot looking up at Scar in the distance. The plan is on…
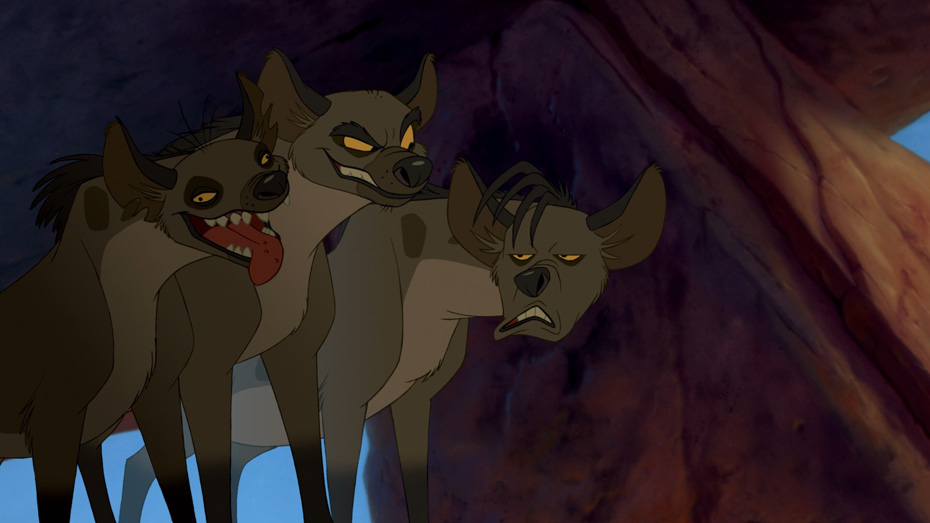
Shot 4: …and the hyenas, now foregrounded in the shot, can approach the herd.
Shot 5: By cross-cutting back to Simba in the gorge, we have a clear temporal relationship between what is happening above the gorge, and what is happening inside it. The innocence of Simba practicing his roar is held in tension against the information we know that he doesn’t: something big and bad is headed his way.
Shot 6: The roar echoes against one side of the gorge…
Shot 7: …and the other. But by framing the second shot of the gorge at a tilted angle, with strong, almost unnaturally angled vectors in the rock face and their shadows, with such little space in the frame devoted to seeing the sky, the audience is unsettled. This frame, even though it involves no camera movement and no characters, feels almost violent.
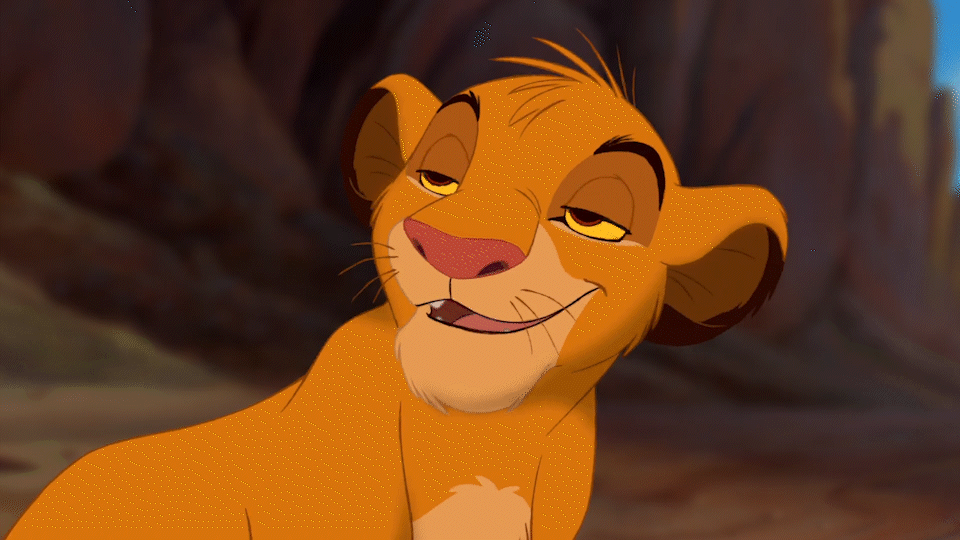
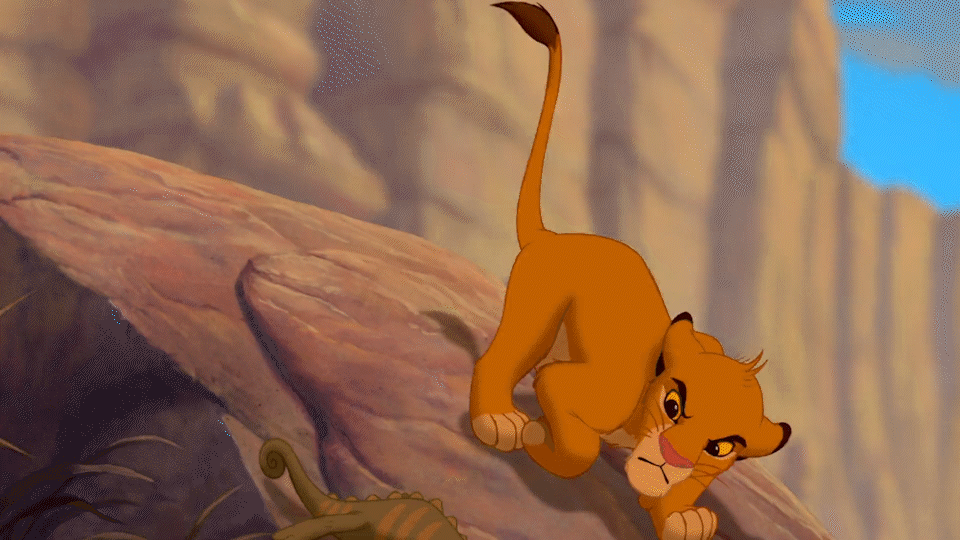
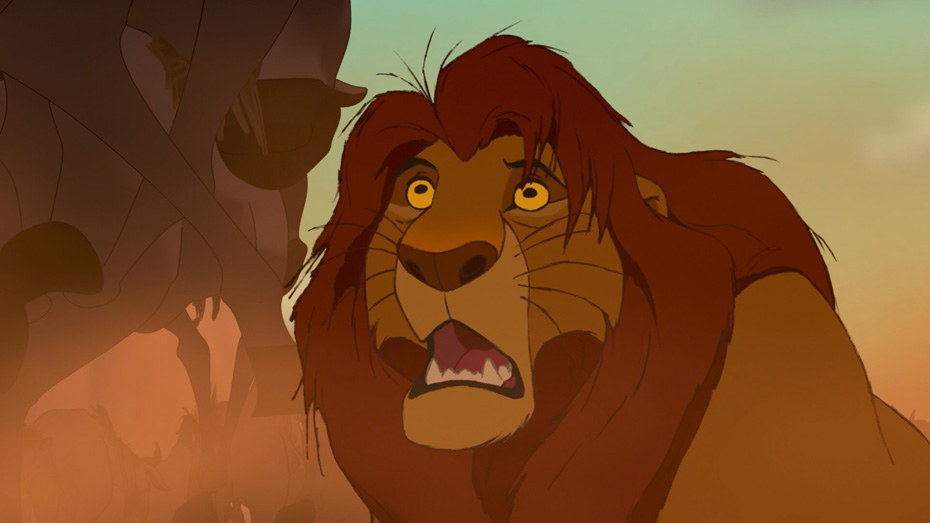
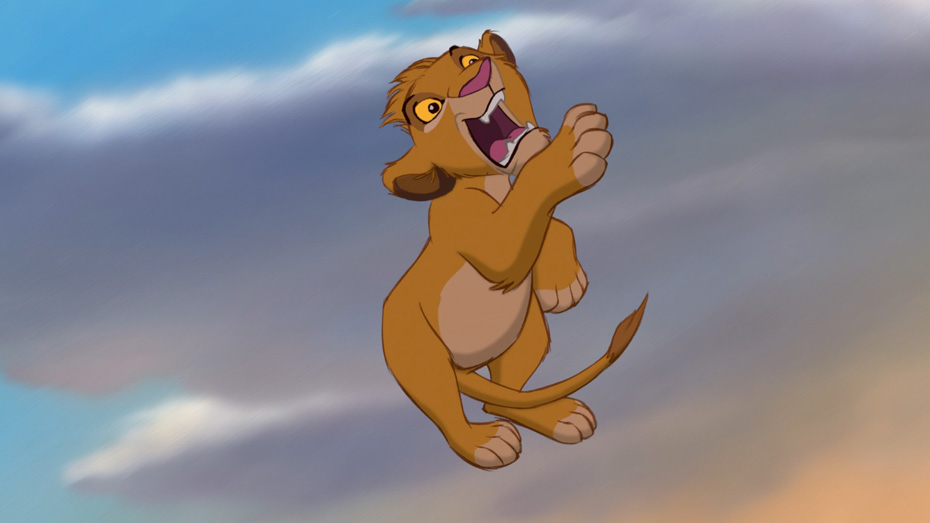
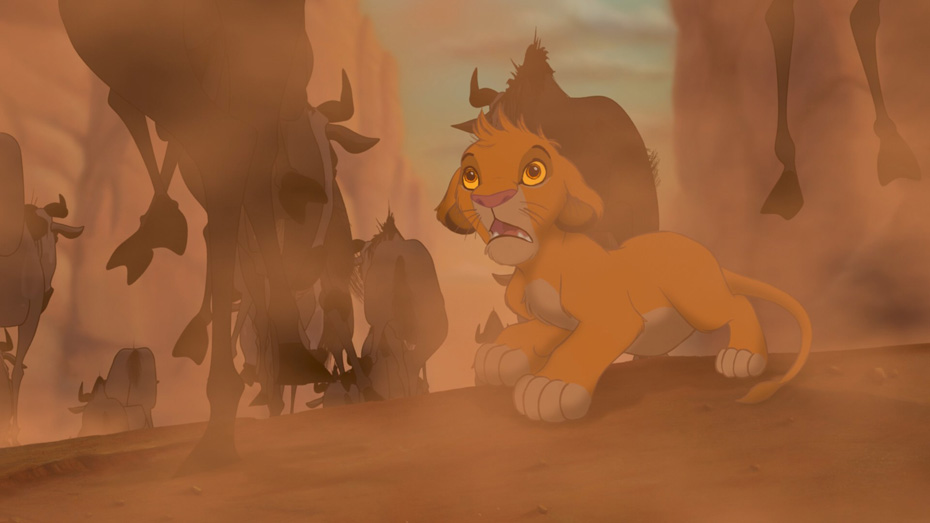
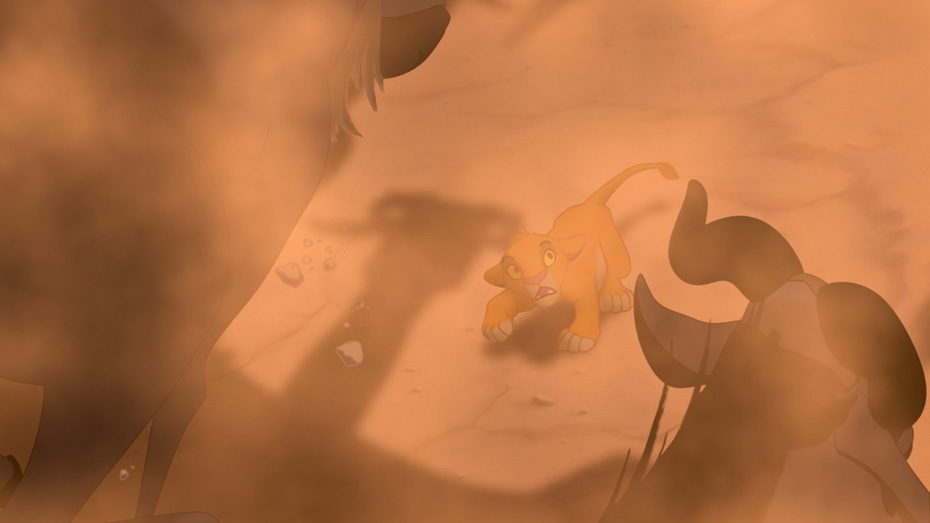
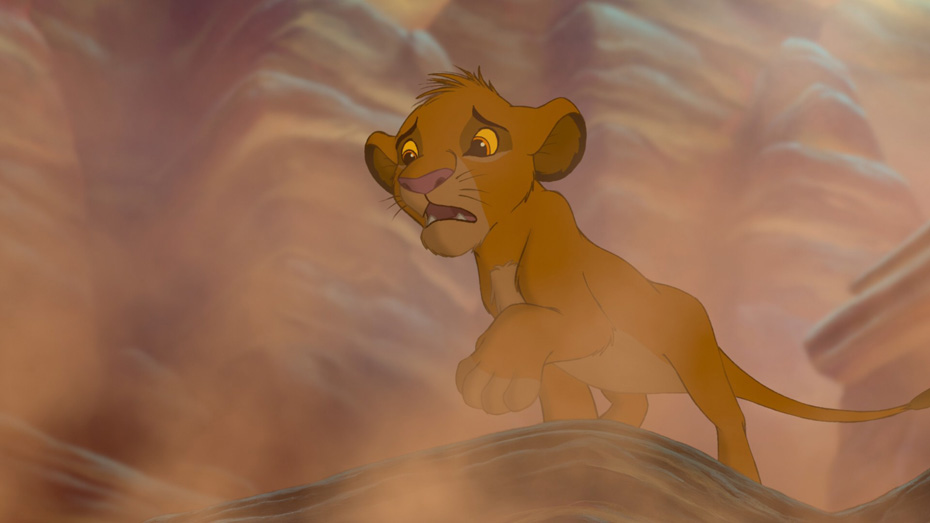
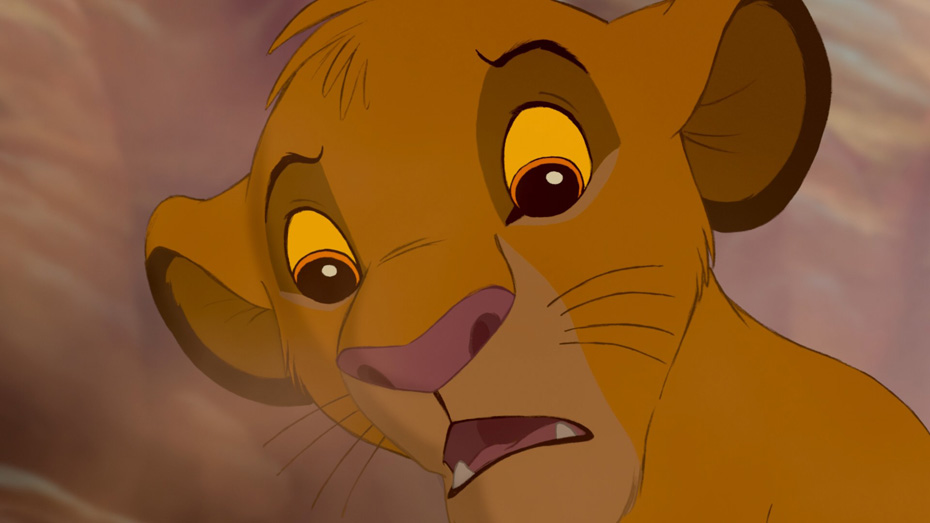
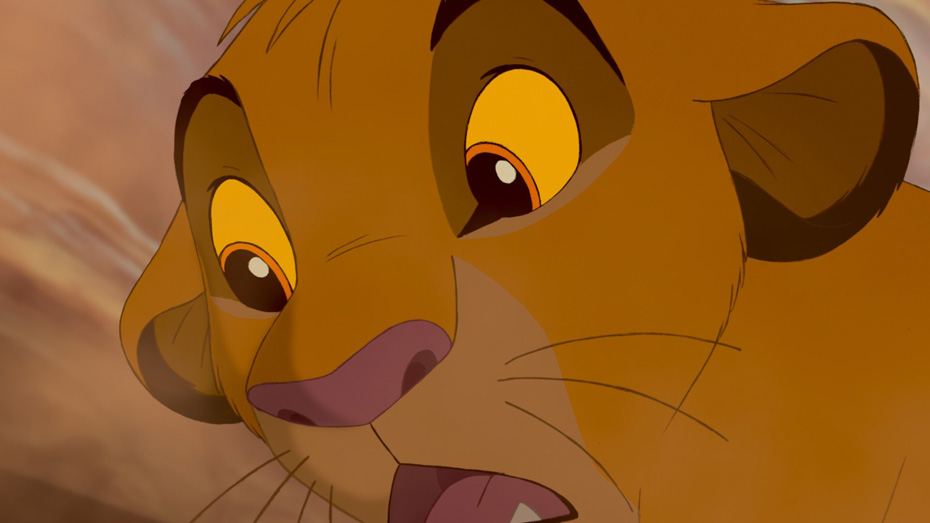
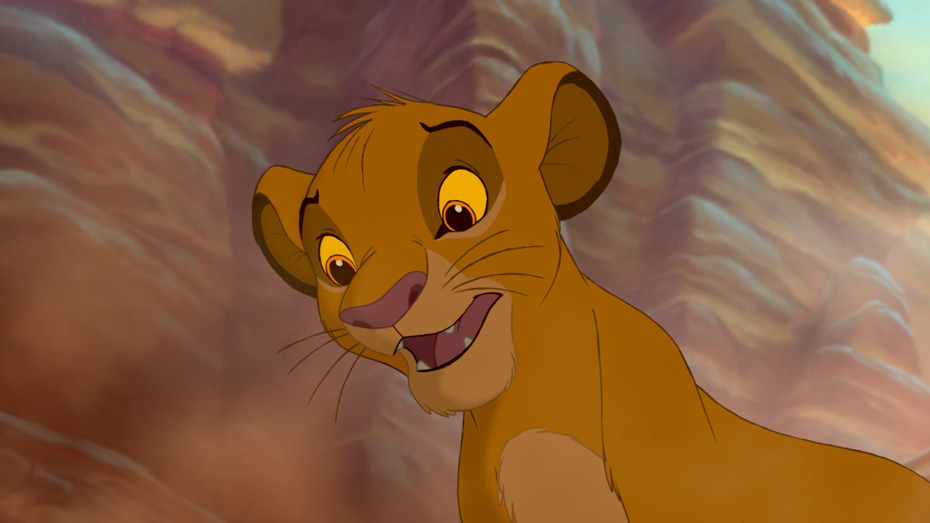
Shot 8: Simba’s emotions mirror our own. We follow his gaze down towards a sound off-screen.
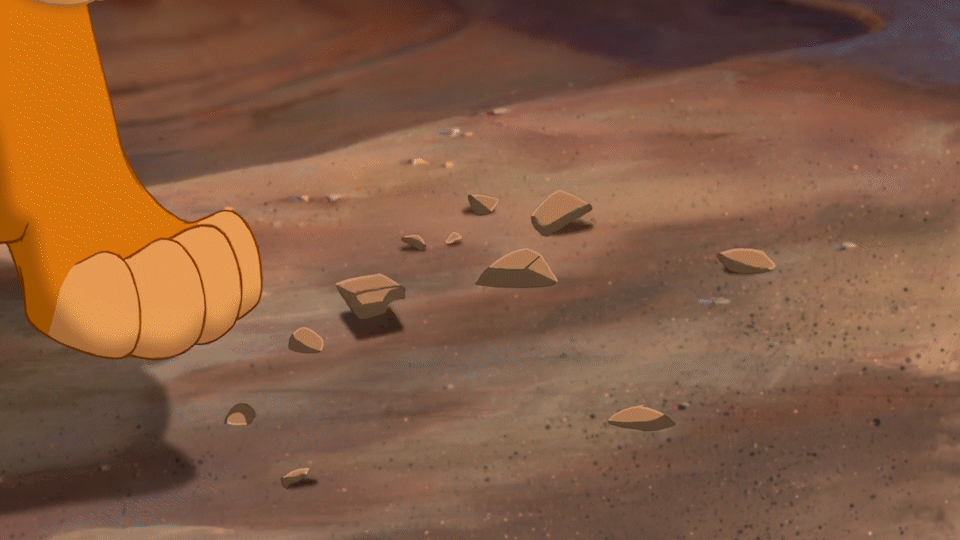
Shot 9: While this is not strictly a POV, we see what Simba sees – loose rocks rumbling as something approaches. As we tilt back to Simba’s face, notice how we have subtly moved from the medium close up in SHOT 8 to a close up, as Simba looks to the top of the gorge, ever so slightly heightening the tension.
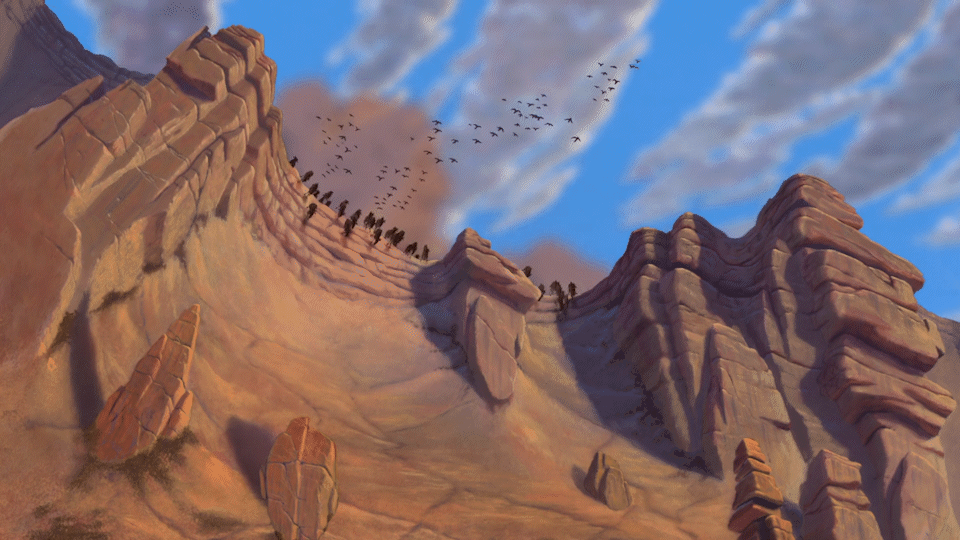
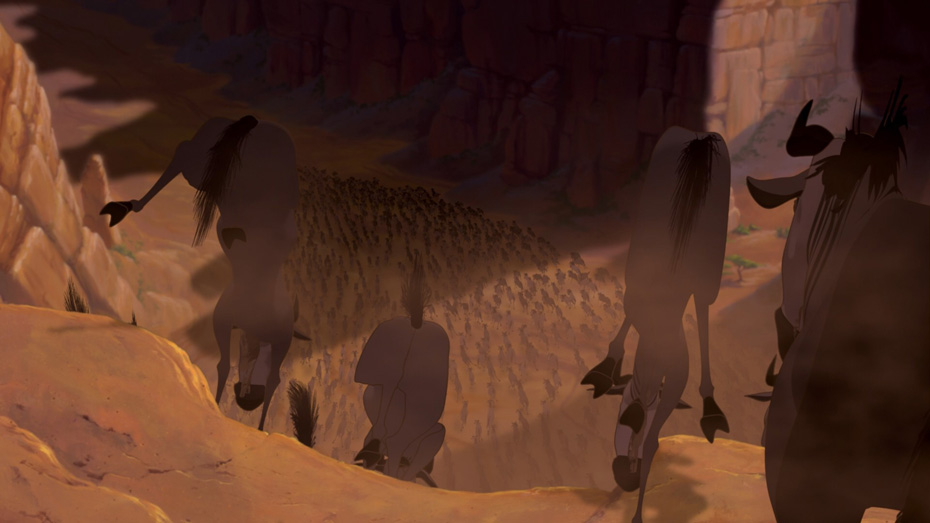
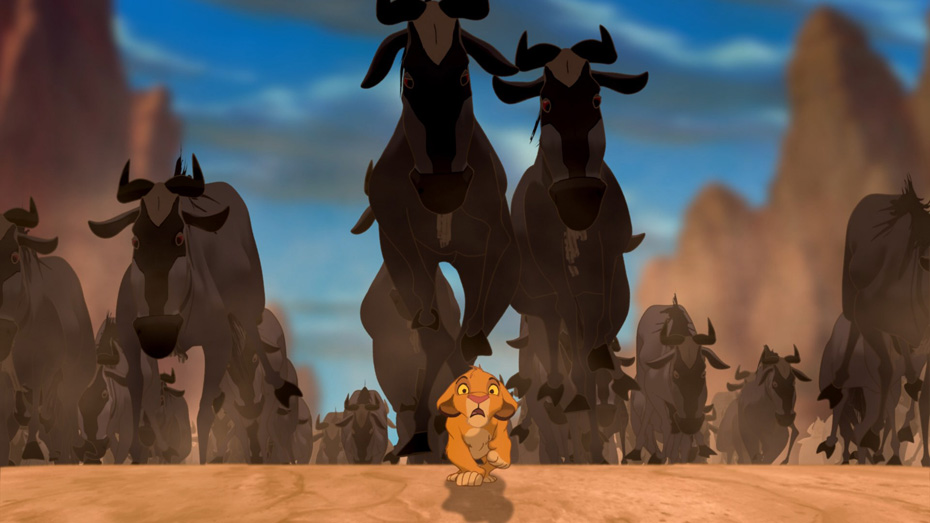
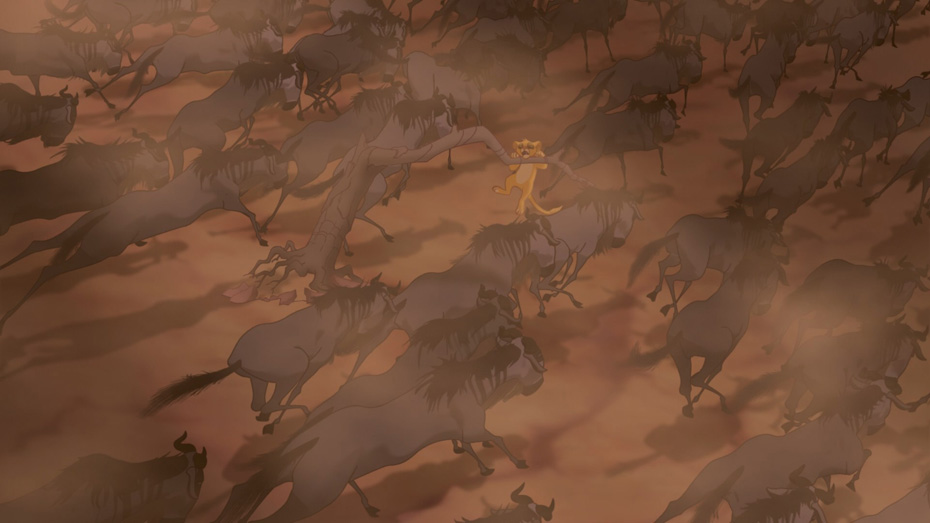
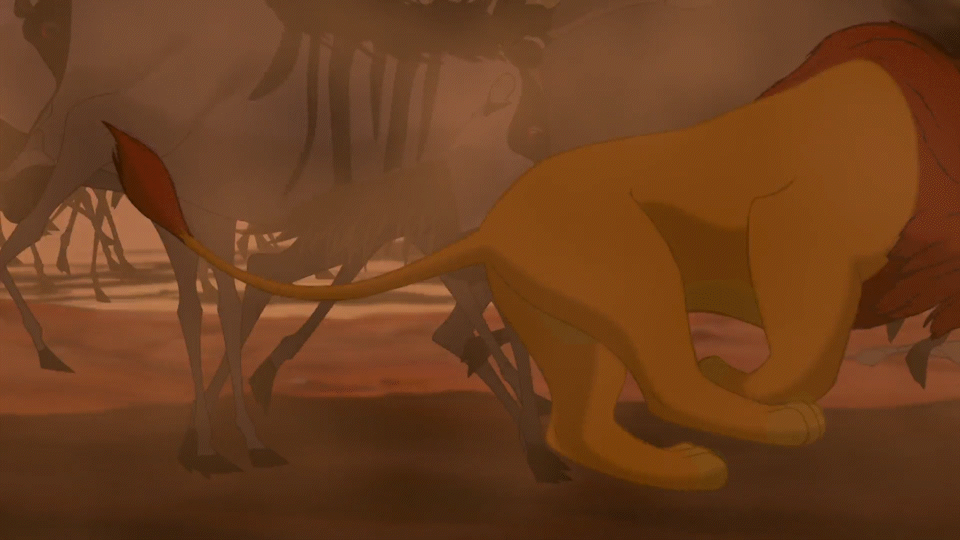
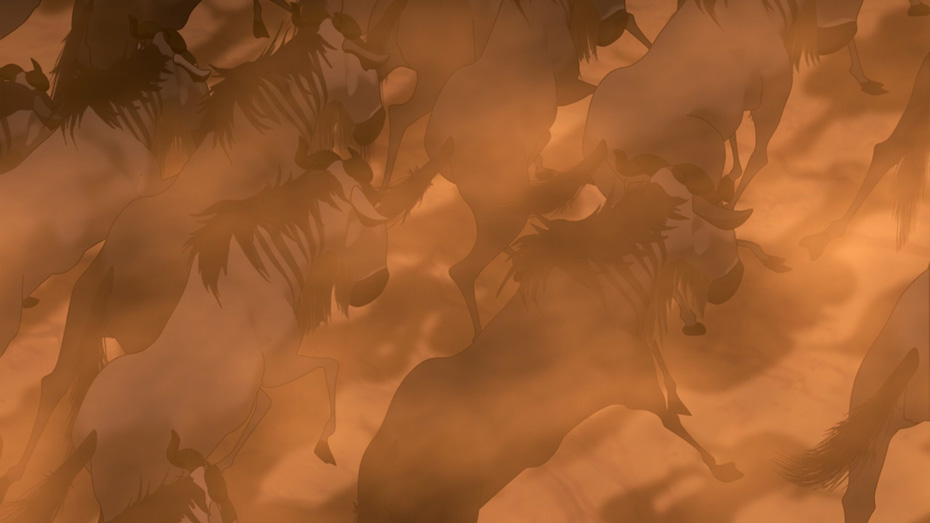
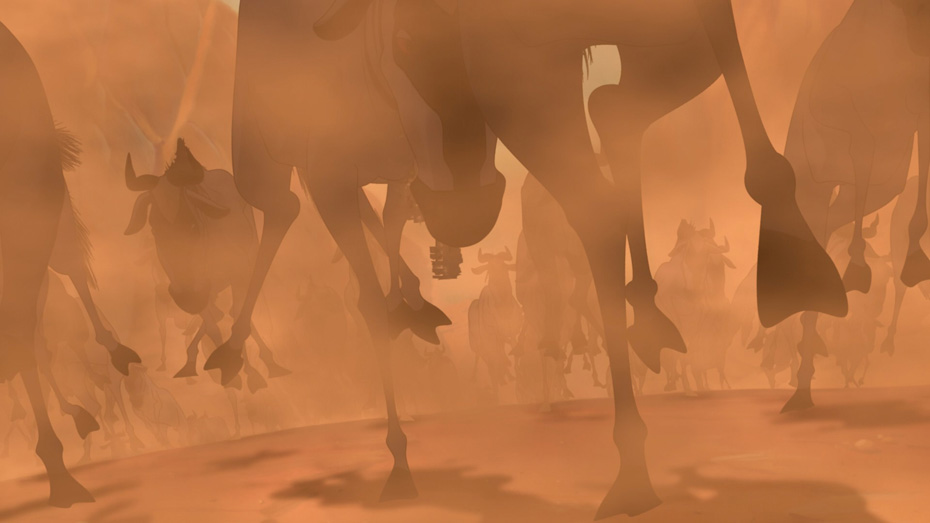
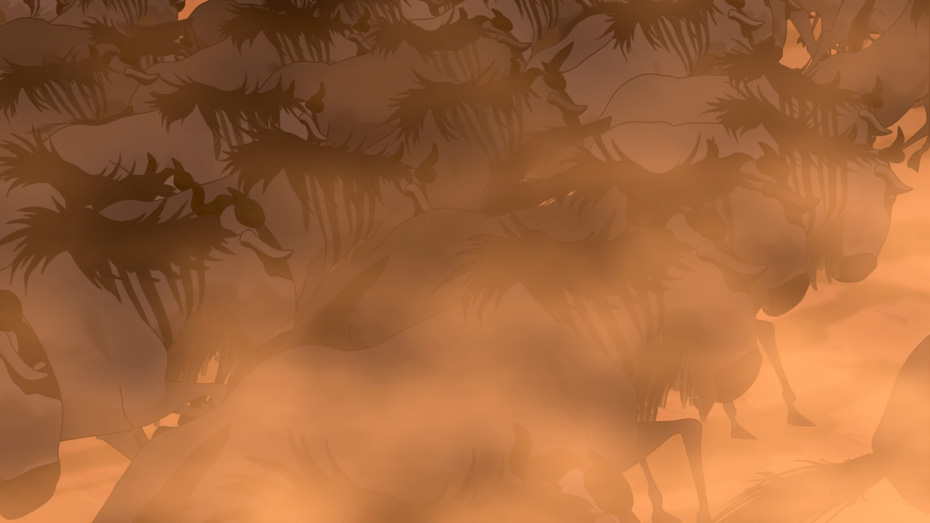
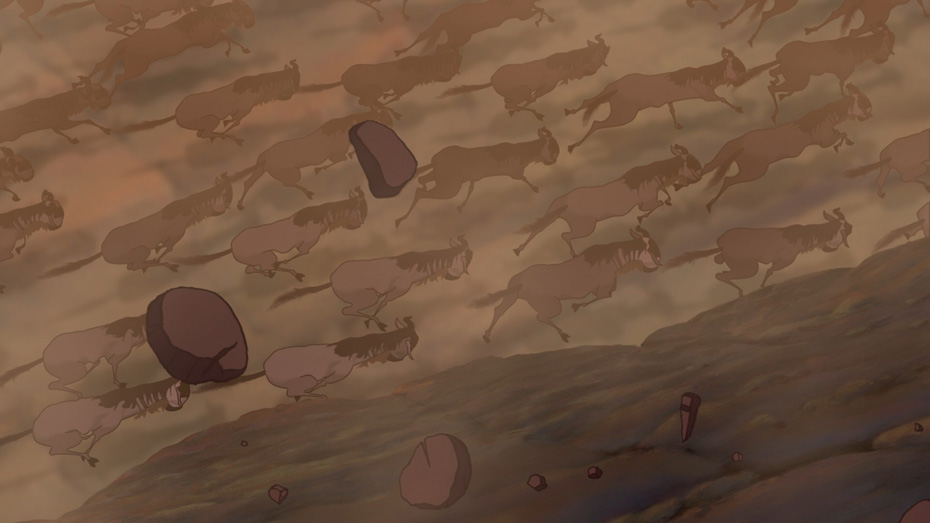
Shot 10: The cause of the rumbling as well as Scar and the hyenas’ plan is revealed: the wildebeests stampede into the gorge from frame left to right.
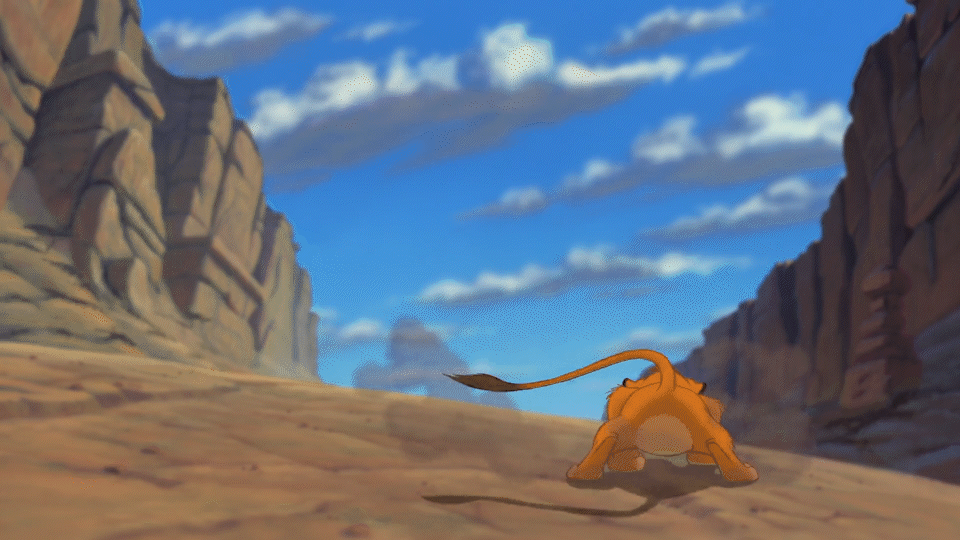
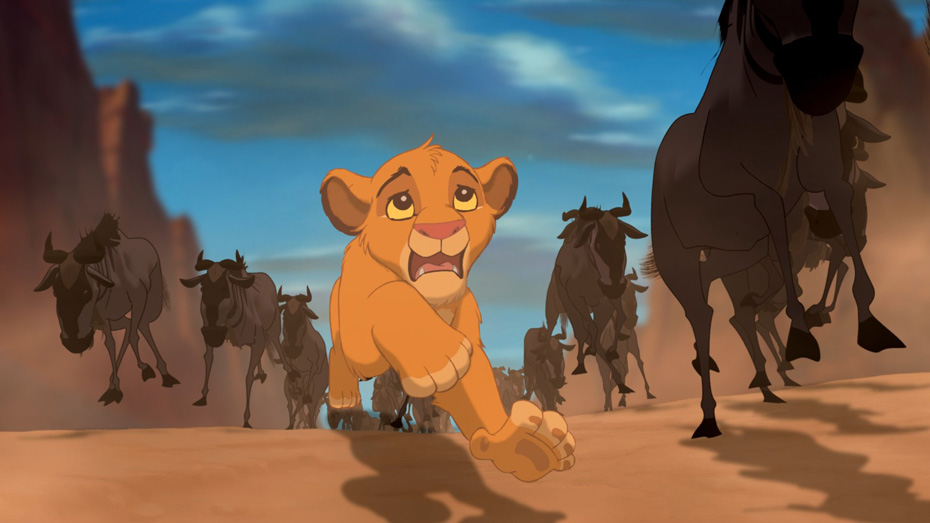
Shot 11: One of the most iconic shots of the entire film. The dolly-zoom movement in this shot serves to both echo the motion of the stampede towards Simba, as well as emotionally underscore the intensity of Simba’s realization. The camera’s starting position places Simba at the bottom of a wide shot. By using a longer lens, they are able to frame the sky out of the shot – Simba is small, and he is trapped. As the camera booms towards him and pulls focus, it also zooms out to a wider focal length. The camera’s end position is slightly below Simba, and the wider focal length shows us the vastness of the gorge, emphasizing how trapped he is.
PART 2 – THE STAMPEDE
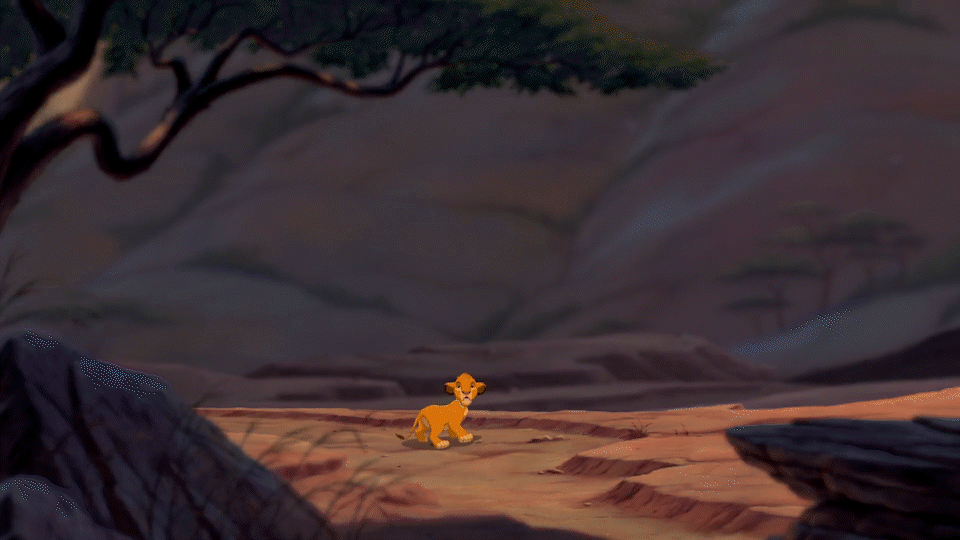
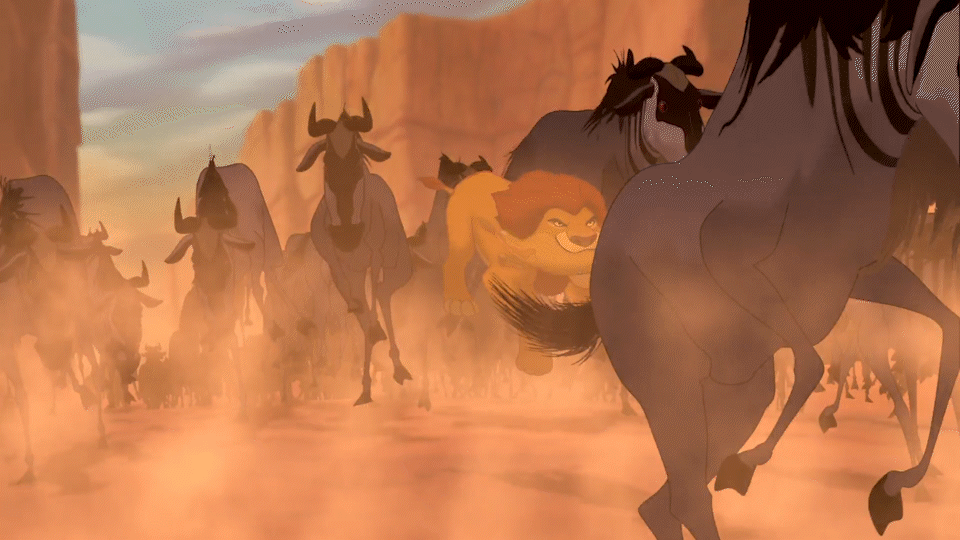
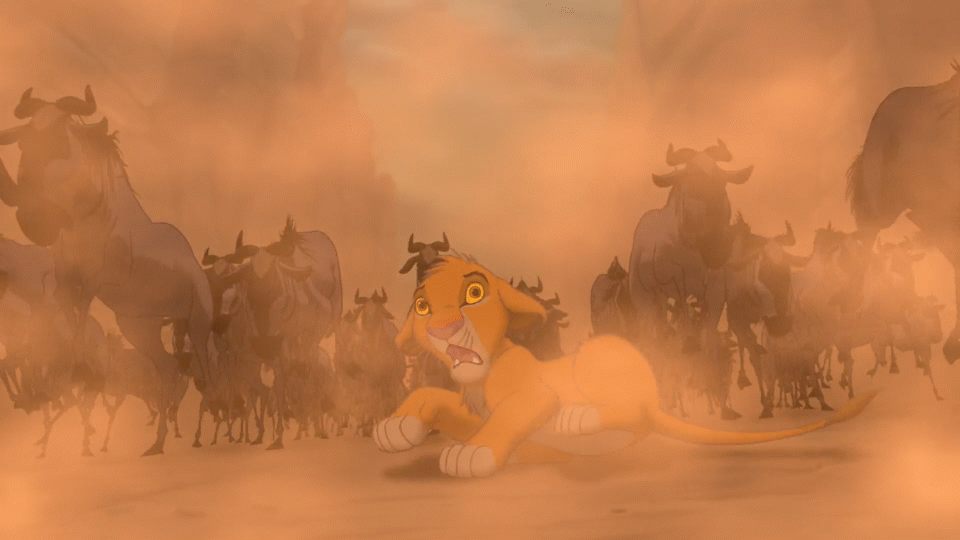
Shot 12: Notice how often during this part of the scene the animators choose to frame Simba’s entire body in a wide shot low in the frame. As he takes in the sight of the stampeding wildebeests, we pull focus to him – it’s time to run.
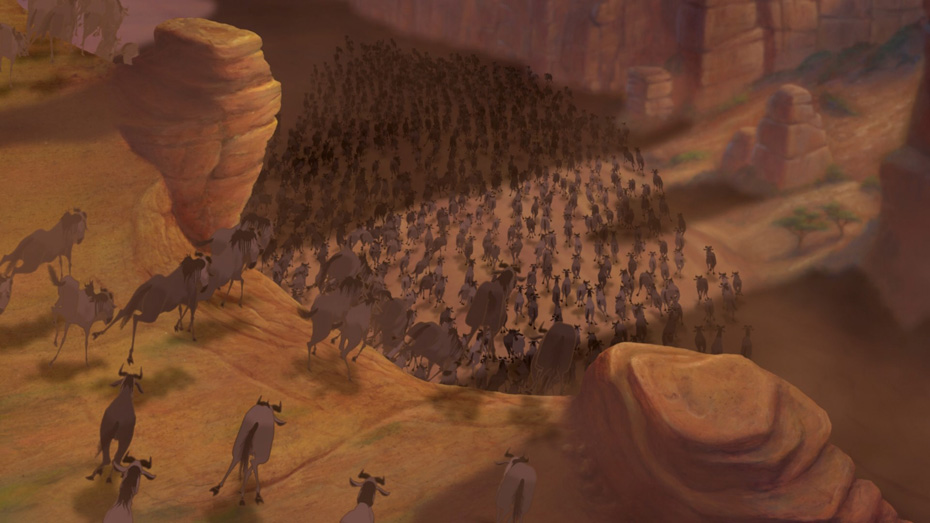
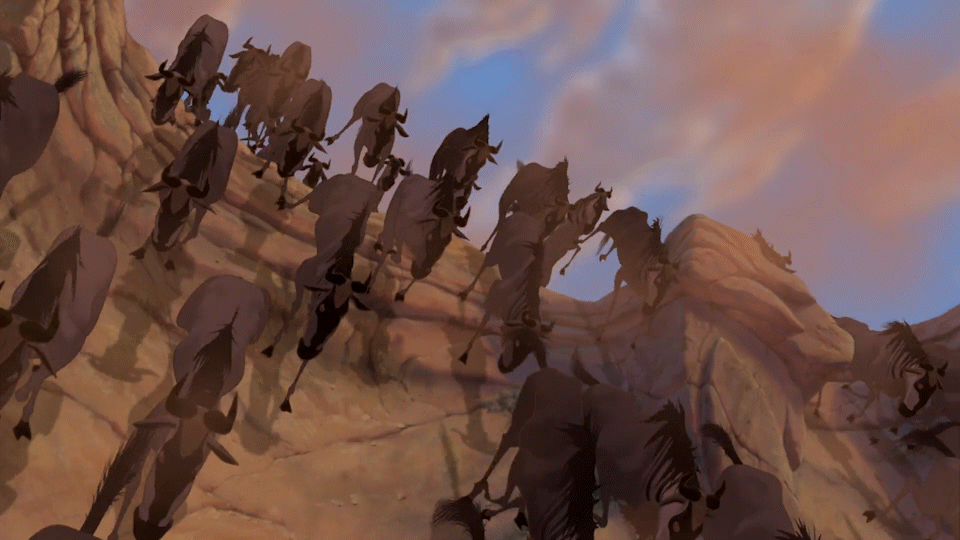
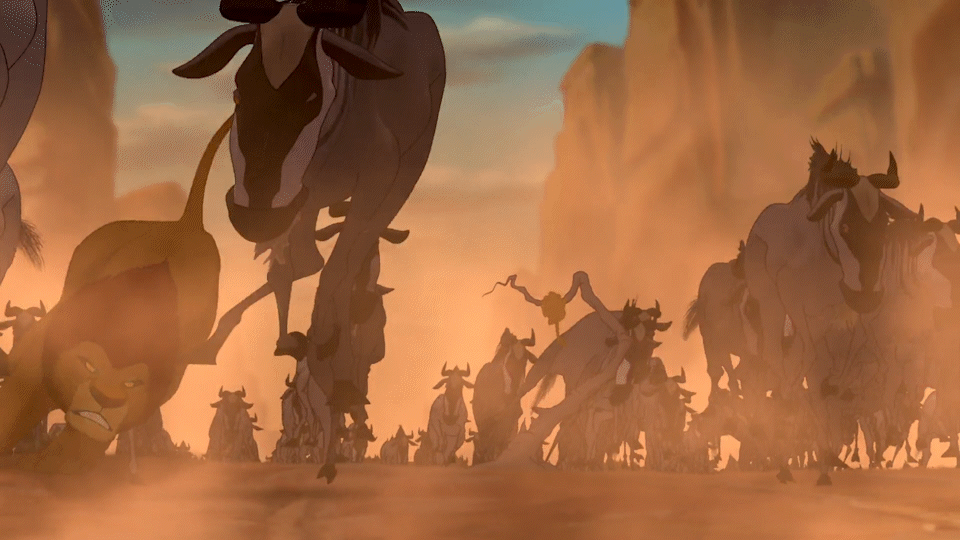
Shot 13: The slow overhead pan from left to right into the gorge re-establishes the central geographic relationship of the sequence: what’s outside the gorge versus what’s inside. But the pan also emphasizes just how many wildebeests are in this stampede, and heightens the stakes of the action.
Shot 14: SHOT 14 is set up similarly to SHOT 12, with one key difference – the tree is framed in the midground. As it recedes into the distance, we understand that Simba has left a potential source of safety behind.
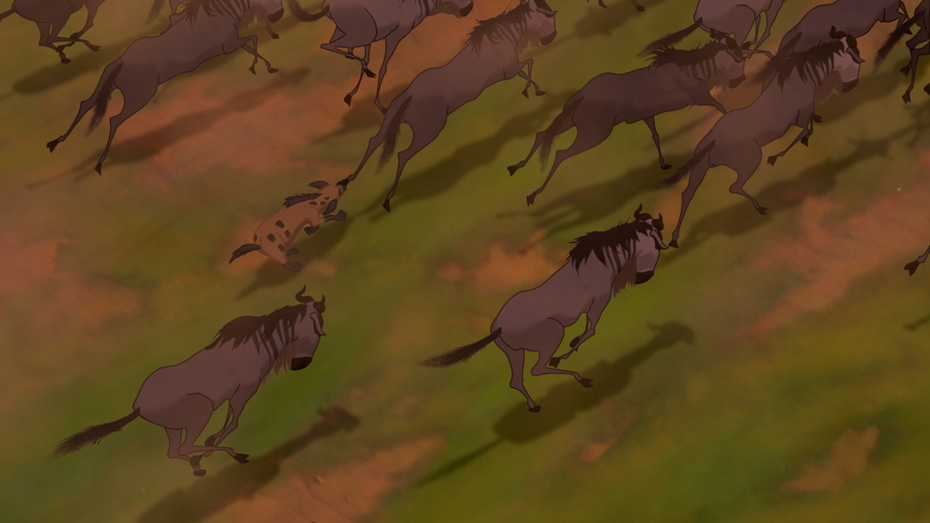
Shot 15: Another overhead shot of the stampede moving from left to right above the gorge initially appears to show the same information that we see in SHOT 13, but framed closer in, the animators reveal a new piece of information – the hyenas chasing the herd.
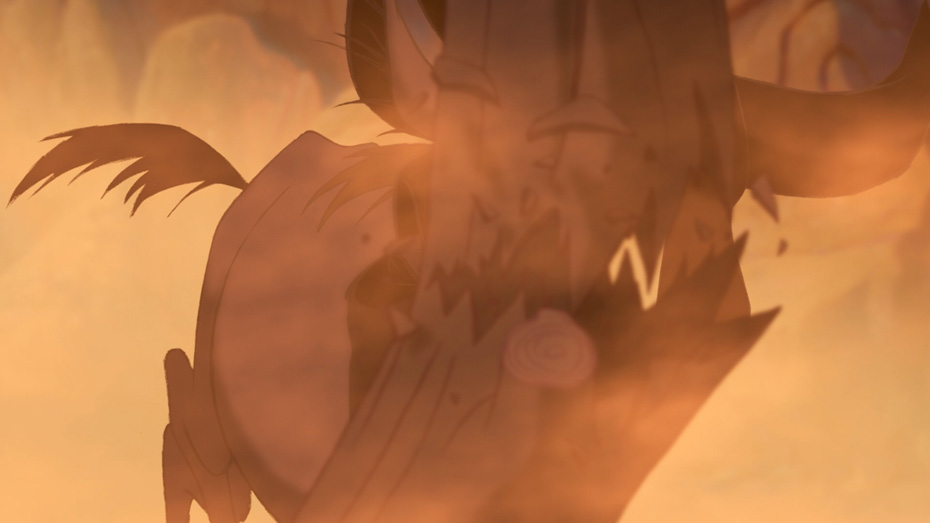
Shot 16: Shenzi runs into a close-up as she snaps at a wildebeest, answering the questions posed at the top of the scene on what their plan was to begin with.
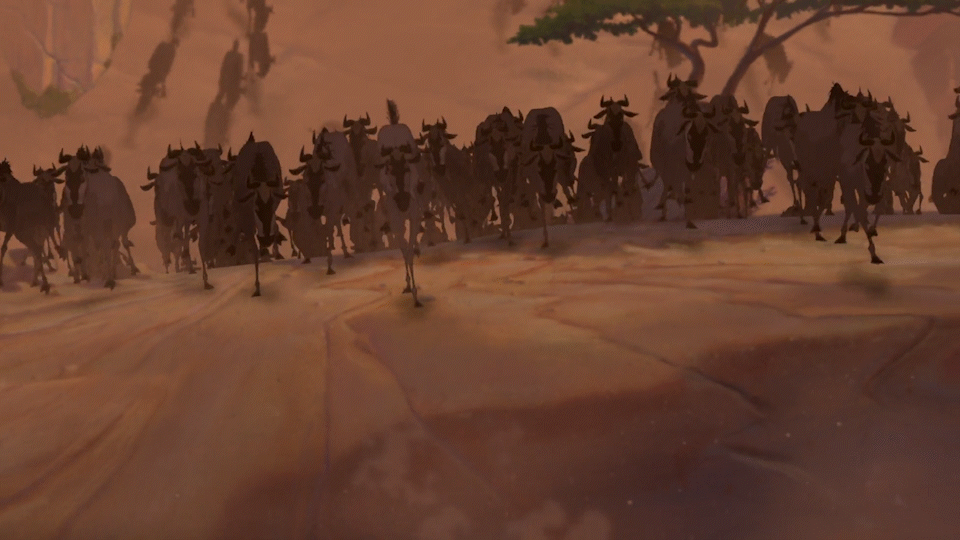
Shot 17: The wildebeests pour into the gorge from frame left to right in a seemingly endless stream…
Shot 18: …until the final ones crest the hill. We see the hyenas framed in a wide shot from a low angle, indicating that their role in this scene has come to an end.
Shot 19: Now that we understand the immense scale of this stampede, the animators take us back inside the gorge to Simba. When he crosses over the horizon, and the stampede follows into frame, we understand that this is not an ordeal he’s likely to escape.
PART 3 – SCAR TELLS MUFASA

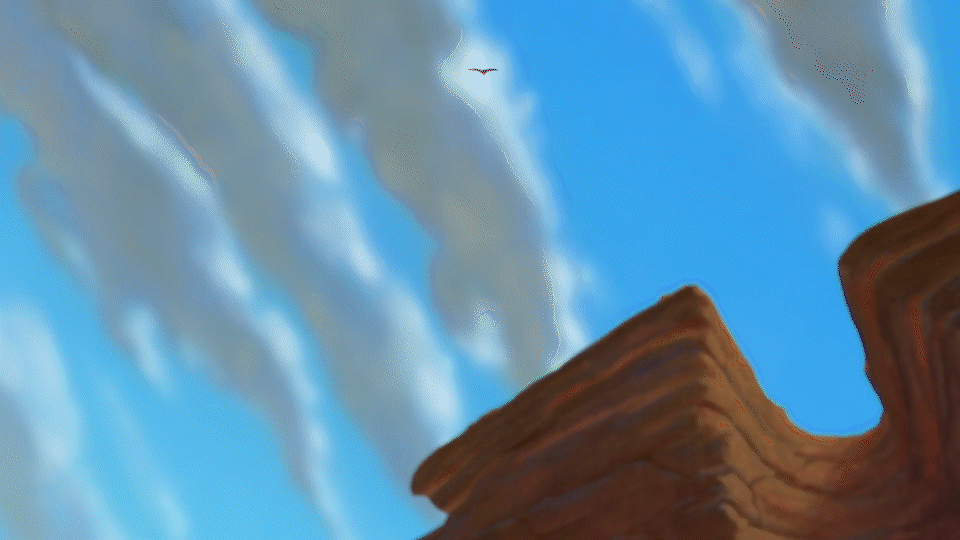
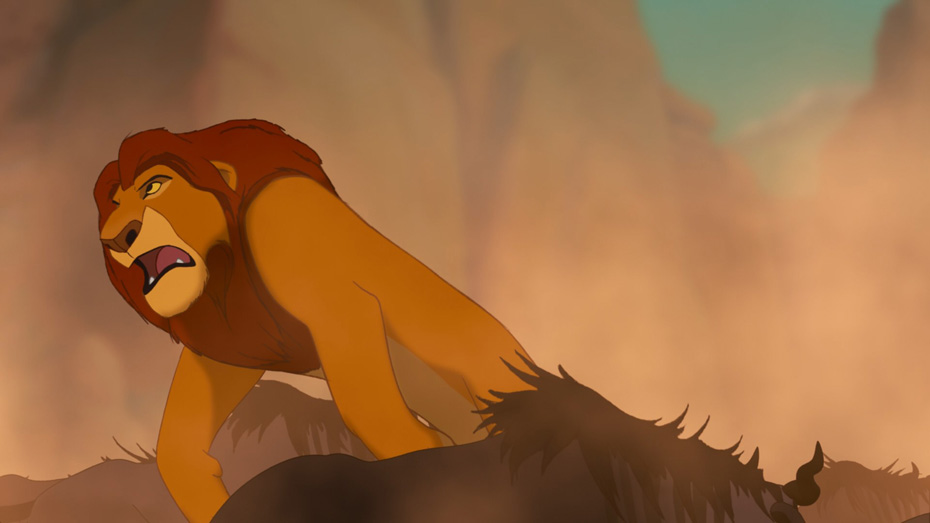
Shot 20: We are taken back outside the gorge – but this time to Mufasa and Zazu, who hear the commotion in the distance. Notice how the clouds rendered by the animation team create vectors in the frame that draw our attention to the gorge, even with Mufasa and Zazu in the foreground.
Shot 21: A high angle shot showing Scar in a desperate panic. This is the first time we’ve seen him up close in the scene, but we know his emotions are disingenuous.
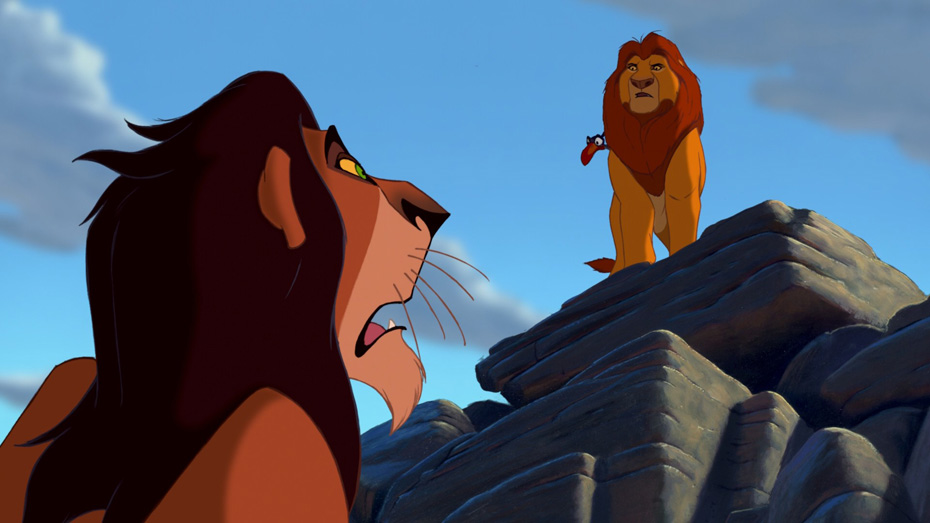
Shot 22: A low angle over-the-shoulder that frames Mufasa dominantly as Scar tells him Simba is trapped in the gorge.
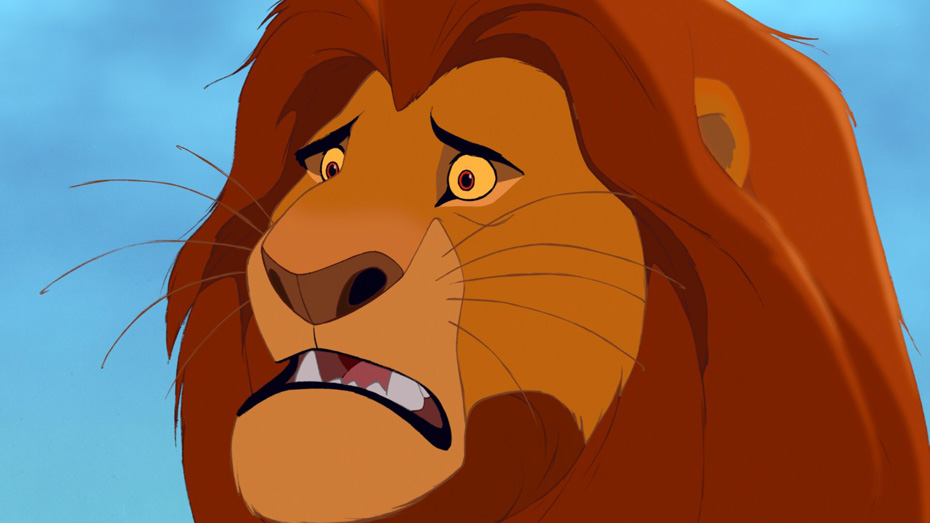
Shot 23: The camera frames Mufasa in a close-up. The shock of this realization hits him.
Shot 24: Back inside the gorge. In a frame that recalls SHOT 12 and SHOT 14, Simba is still running for his life. With the wildebeests towering over him, he appears closer to death than ever before.
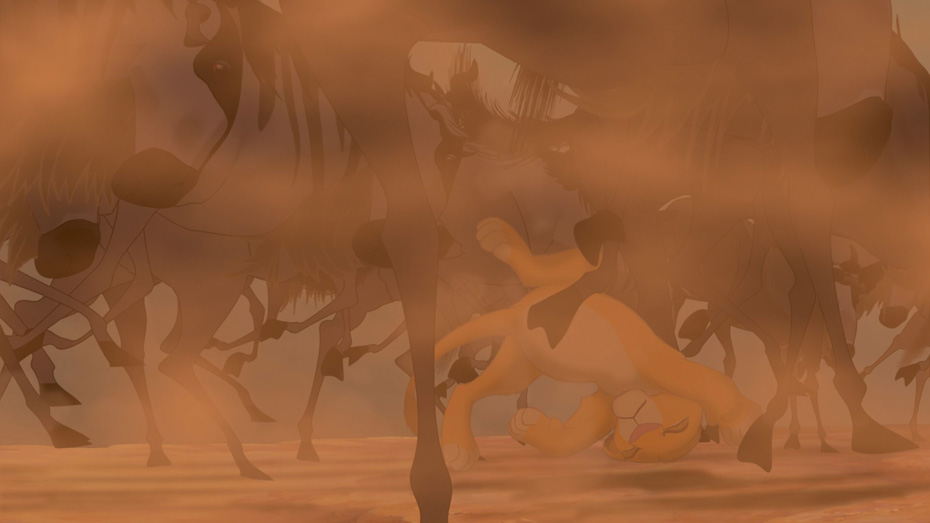
Shot 25: The wildebeests close in and overtake Simba moving from frame left to right in this moving overhead medium.
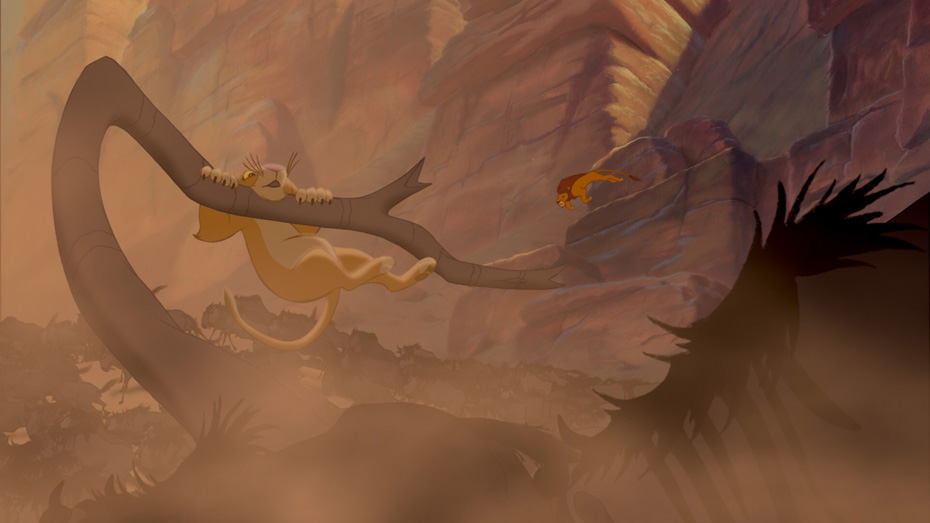
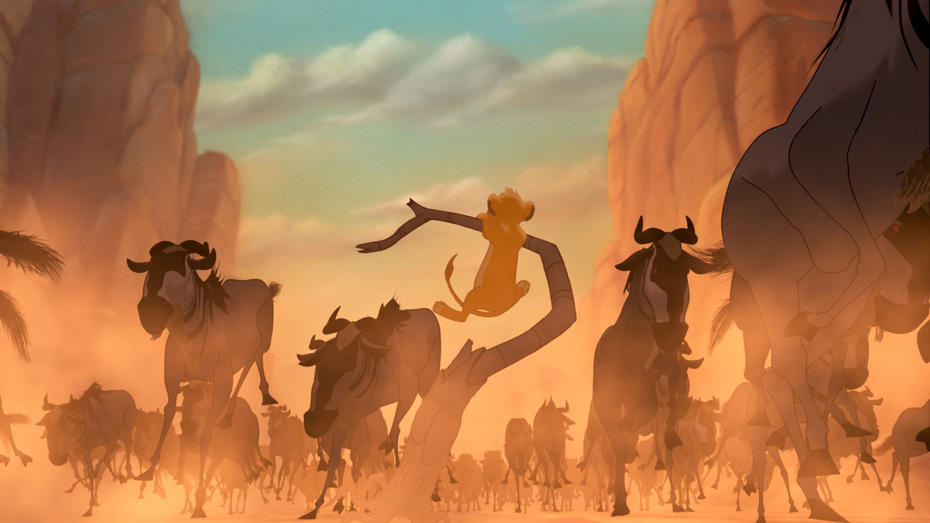
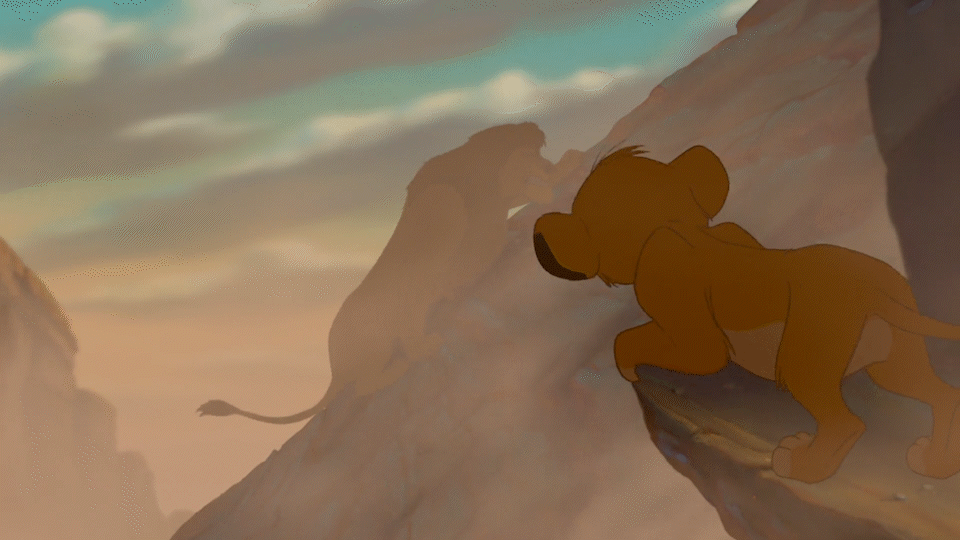
Back to Shot 24: Simba spots something off frame as he runs past the camera. Does he see Mufasa? A route to safety?
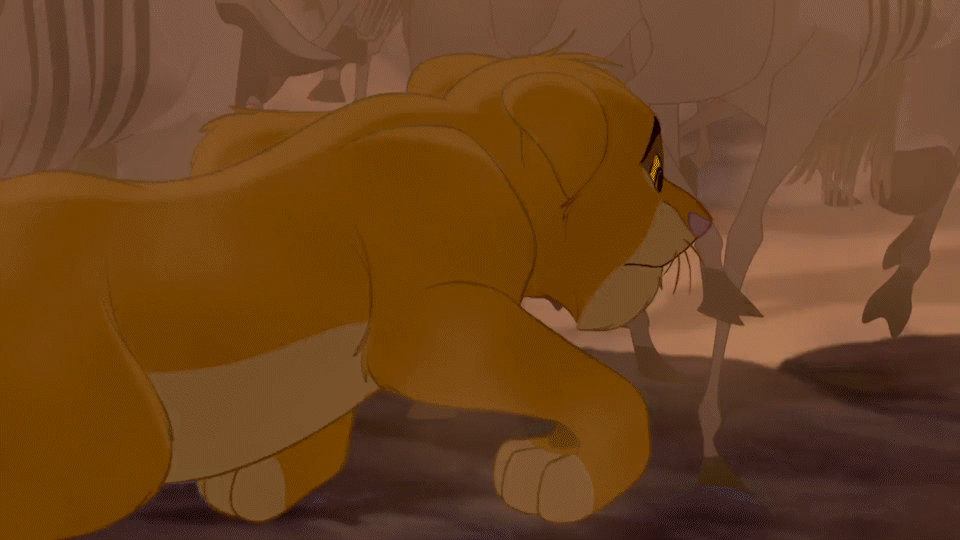
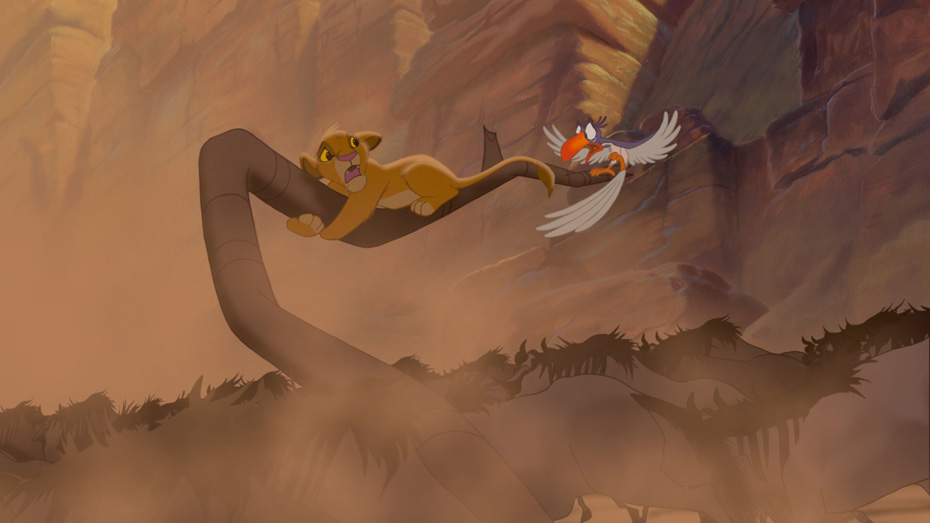
Back to Shot 25: SHOT 25 answers the question posed by SHOT 24 – Simba desperately scrambles onto a tree as the stampede goes past him. After this sustained period of extreme tension, we’re given a brief release. He has found safety for now. But this shot poses a new different kind of tension: how long can this safety last?
PART 4 – MUFASA, SCAR, AND ZAZU ARRIVE
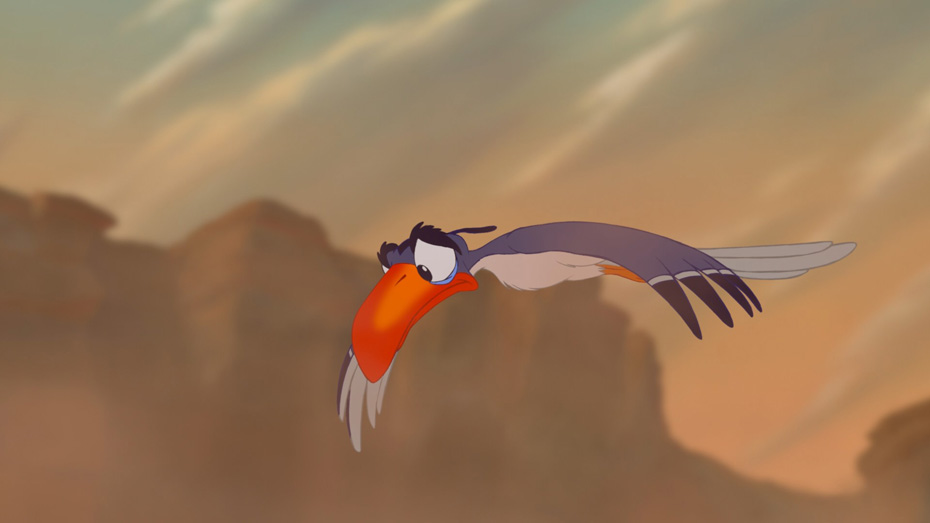
Shot 26: Back outside the gorge. The filmmakers cross-cut to Mufasa, Scar and Zazu heading at full pace towards the gorge. They move from frame right to left – the opposite direction of the stampede established in previous shots. Zazu flies ahead…
Shot 27: …and we cut on action, back inside the gorge. Zazu flies into a close-up as the camera tilts down, and as it finds its new horizon inside the gorge, he flies off into a wide looking for Simba. Will Zazu find him?
Shot 28: The camera flies with Zazu from right to left in a medium shot as he looks for Simba. He stops and dashes out of the bottom-left corner of the frame…
Shot 29: …to Simba, who clings for life to the tree. But notice how both Zazu and the wildebeests are running from frame right to left? That change in screen direction helps disorient us. We can track the characters because of their composition and their colors, but by switching the direction of the motion in the frame, the filmmakers help sow even more seeds of chaos.
Shot 30: Mufasa and Scar come down from right to left, and Zazu points out where Simba is in the gorge.
Shot 31: We cut into their POV. The wildebeests, now running from left to right again, hurtle past Simba and the tree. We’ve moved from the subjective experience of Simba, running for his life, to Mufasa, protecting his imperiled son. This will become our dominant emotional perspective into the next section of the sequence.
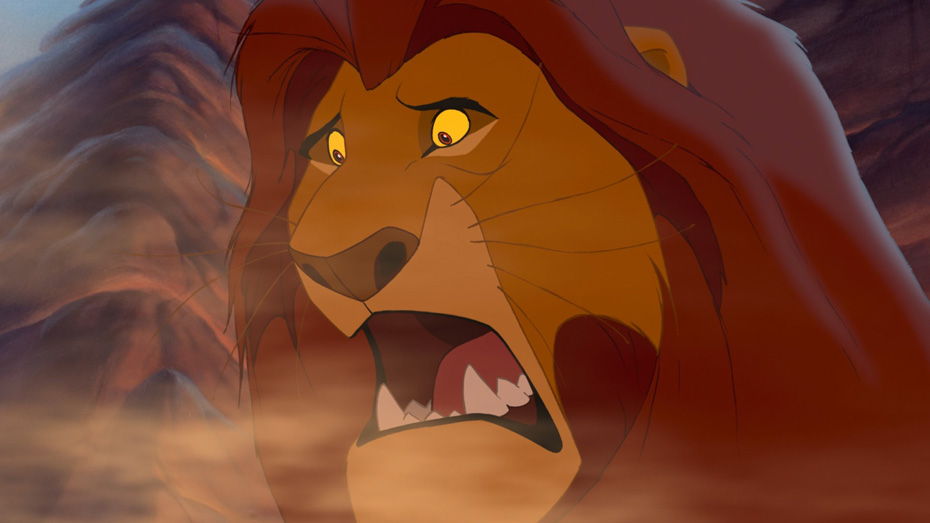
Shot 32: This close up on Mufasa is framed almost identically to the close up in SHOT 23, when he first learned that Simba was trapped in the gorge.
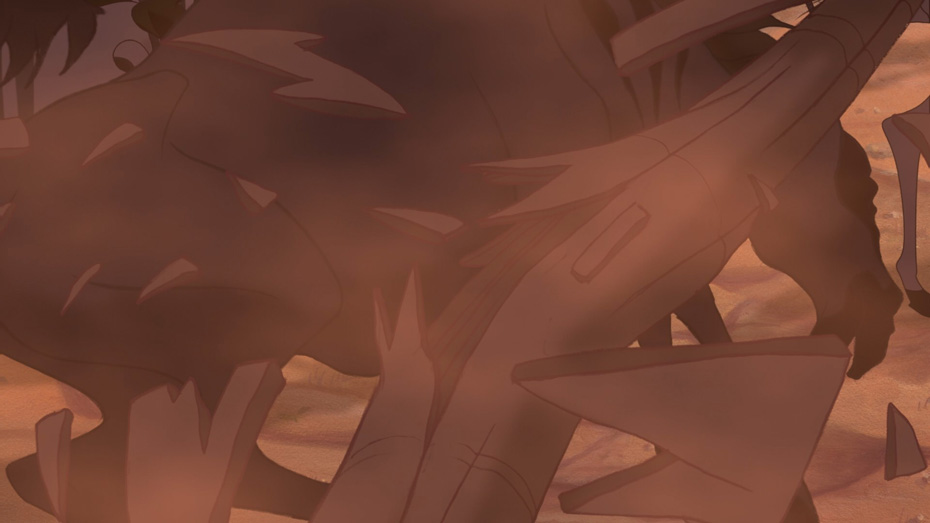
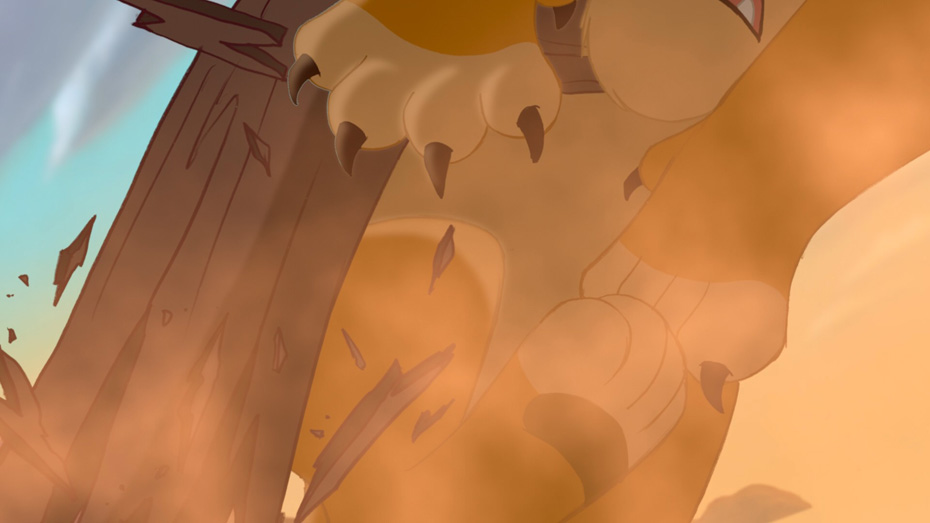
Shot 33: A wildebeest running from left to right smashes through the tree…
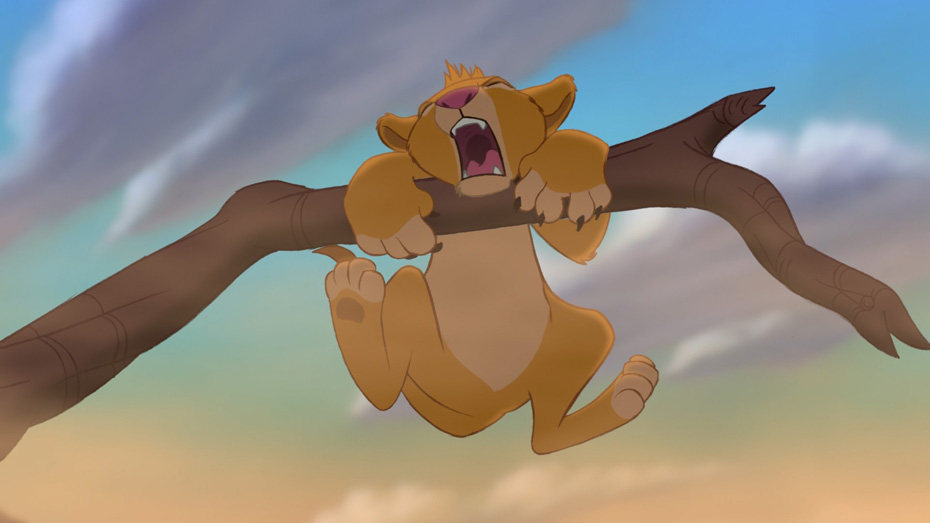
Shot 34: And Simba starts to sway in and out of the frame.
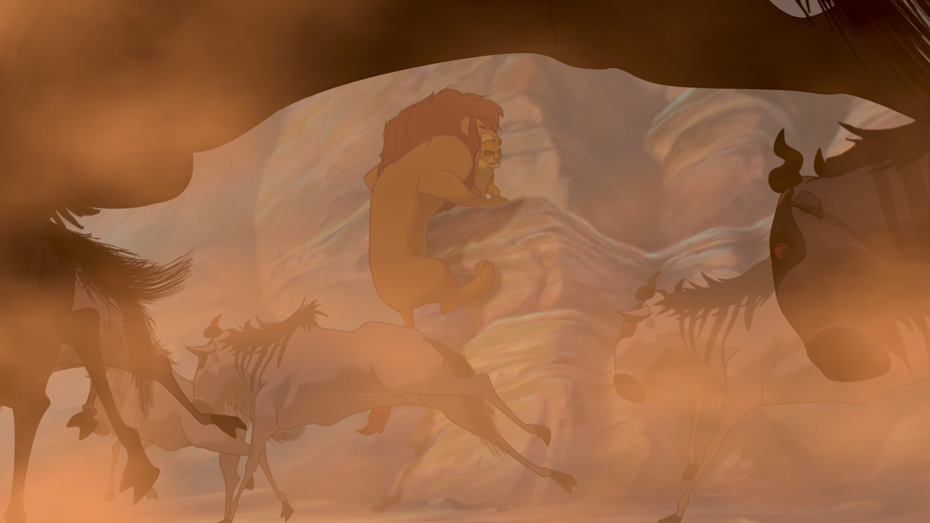
Shot 35: Prompting Mufasa to leap into action. We know are going to be inside the gorge for the rest of the scene.
Shot 36: The wildebeest stampede is back to running right to left, heightening the chaos as Simba hangs onto the tree in the foreground, and Mufasa enters the stampede in the background.
Shot 37: The camera pans left with Mufasa into the reverse of SHOT 36. The stampede is left to right again as Mufasa disappears into the chaos.
Shot 38: Back up on the cliffs, Zazu suggests going back for help, prompting Scar to knock him out of the frame…
Shot 39: …and into the wall (a brief bit of comic relief amidst the dramatic intensity). Simba and Mufasa’s chance at further help is gone. Scar’s plan is working.
PART 4 – MUFASA, SCAR, AND ZAZU ARRIVE
Shot 40: Mufasa runs left to right with the stampede, but as the camera booms up, we realize that he’s gone past Simba and the tree.
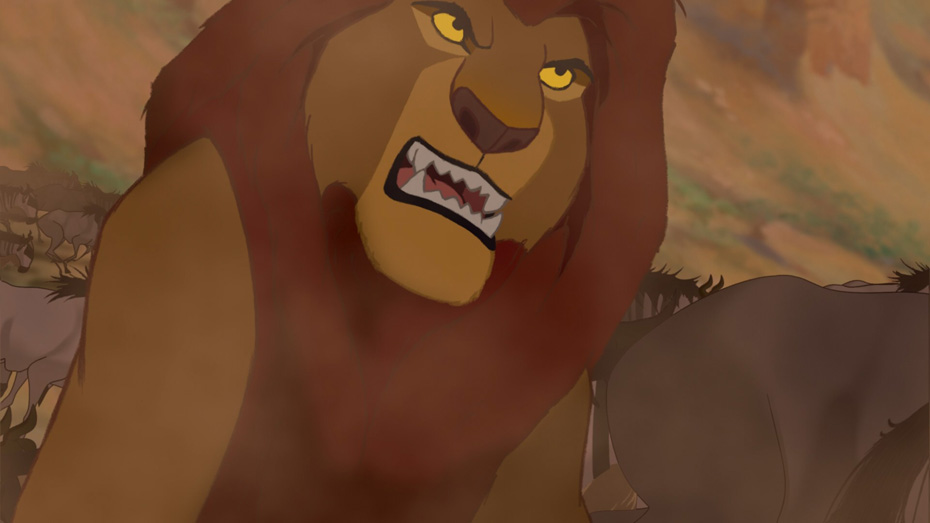
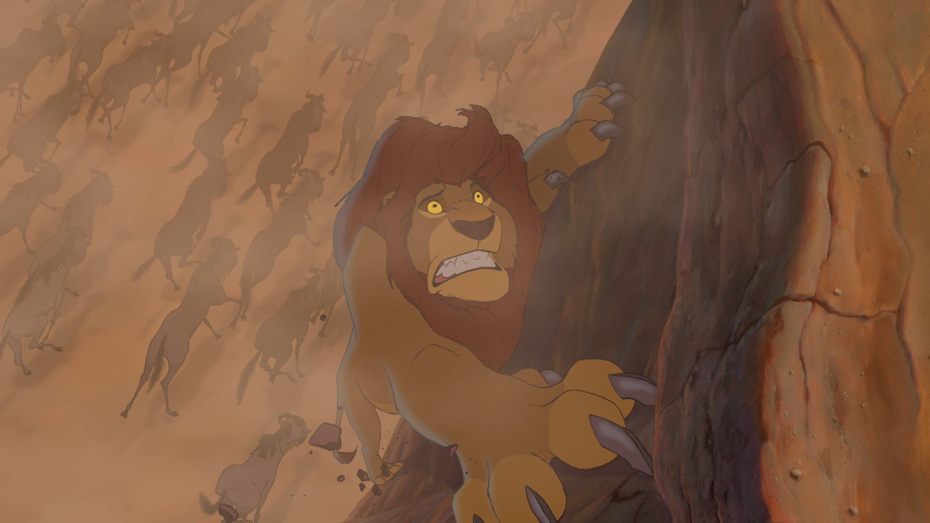
Shot 41: For the first time since SHOT 24, the stampede is running straight at the camera, reminding us of its intensity and ferocity. Mufasa doubles back and heads against the stampede towards Simba.
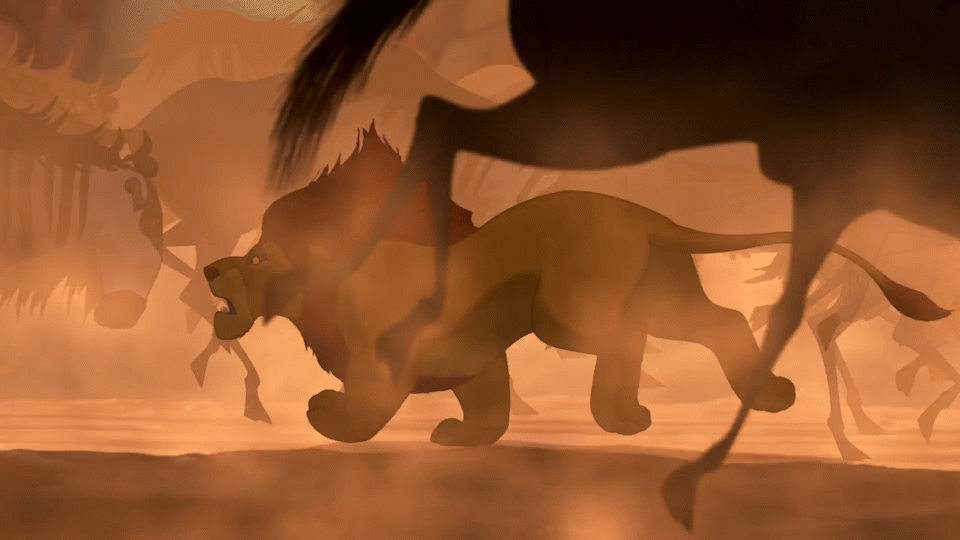
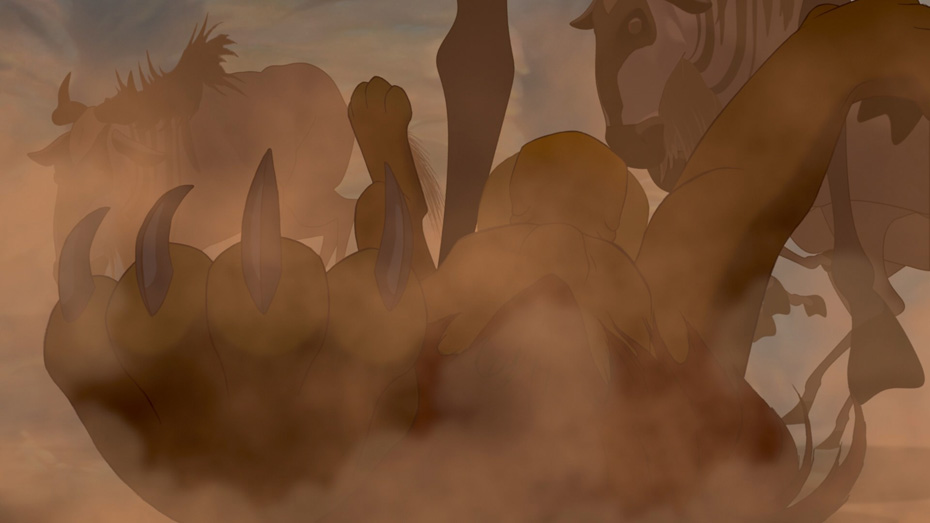
Shot 42: Now running right to left against the stampede, Mufasa collides into a wildebeest. This is the first time we’ve seen a character running against the herd in the middle of the stampede, and the impact of the collision is severe.
Shot 43: Mufasa looks up in horror…
Shot 44: …to see Simba barely hanging on for his life. Notice again that Simba is shown as tiny in the frame in a wide shot that frames lots of movement around him, highlighting his vulnerability.
Shot 45: Another wildebeest running left to right (this time towards the camera) collides into the tree…
Shot 46: …and this time it is a clean break. This flash cut punctuates the violence of the moment.
Shot 47: Simba is sent flying towards peril.
Shot 48: We cut to Simba’s POV and see the devastation he is headed towards. A shift back into Simba’s perspective that will be cross cut with Mufasa’s subjective perspective for maximal emotional impact at this key moment of drama.
Also notice the color contrast between SHOT 47 and SHOT 48, and the way it tells a color story we can track clearly among the chaos. Blue = safe. Brown = danger.
Shot 49: From the midst of the stampede, Mufasa leaps right to left against the tide of wildebeests…
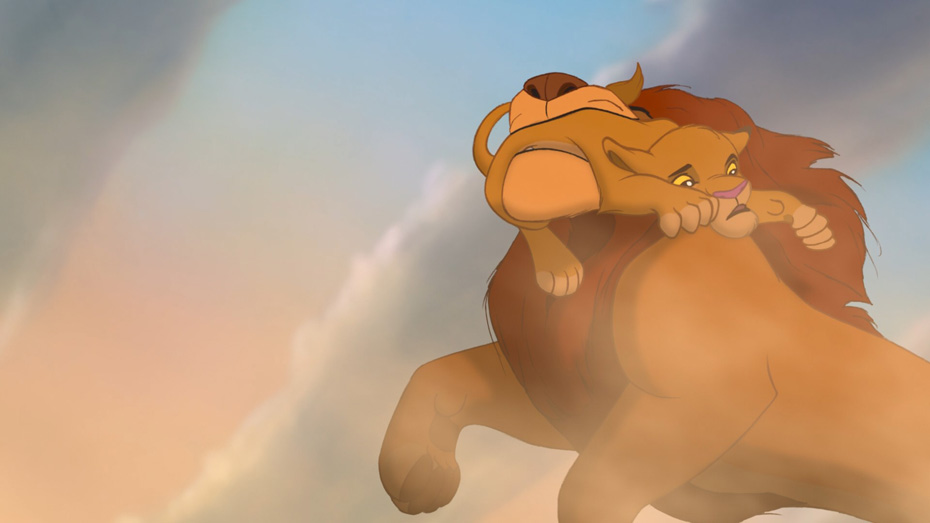
Shot 50: And catches Simba!
Shot 51: We return to a front-on shot of the stampede as Mufasa runs out of frame with Simba.

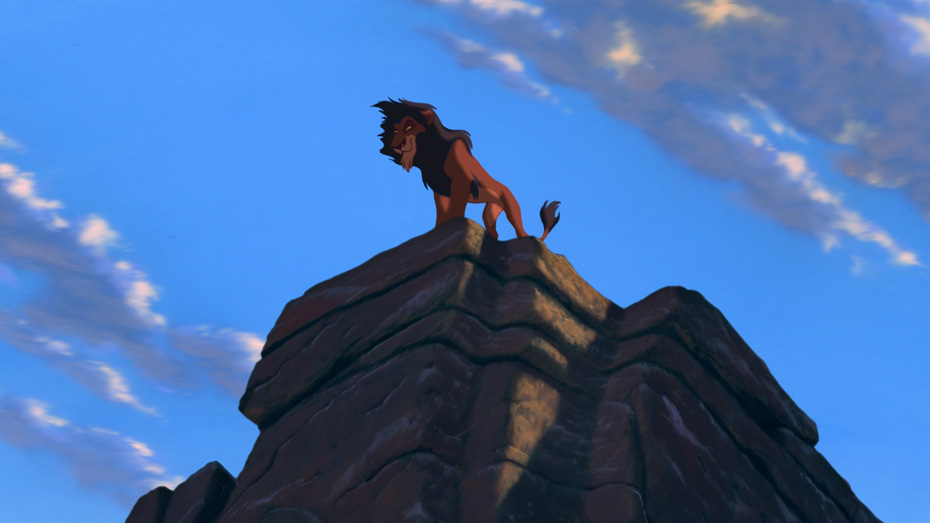
Shot 52: Back up to the cliffs. Scar prowls as he surveys the action. Notice how the blue sky is no longer visible – the animators subtly indicate that there is going to be no escape for our heroes.
Shot 53: Just as we think Mufasa has successfully rescued Simba, a wildebeest collides with him out of nowhere in a close-up, sending Simba flying out of Mufasa’s mouth…
Shot 54: And tumbling left to right among the wildebeests.
Shot 55: Framed in a medium close-up at a low angle, Simba sees the overwhelming barrage of wildebeests…
Shot 56: And by cutting to his POV, we see that he is all but certain to be trampled to death.
Shot 57: The high angle shot framing him as a tiny figure amidst the stampede, which is charging in the opposite direction to him, signals that the end may be near…
Shot 58: …until Mufasa emerges from the crowd and scoops him up just before a wildebeest crashes to the ground where Simba was standing.
Shot 59: In a wide shot that we can barely make out amongst the wildebeests, Mufasa leaps up from left to right as the stampede continues from right to left (notice the screen direction change again?) to place Simba on a ledge.
Shot 60: But just as we start to exhale, he is knocked back into the stampede. Even though we don’t see the wildebeest, the sound design and the screen direction established in SHOT 58 helps us understand what has happened with maximal cinematic efficiency.

Shot 61: The animators take us back out to a wide shot as we now see the peril that Mufasa is in.

Shot 62: After this sustained period of pure chaotic action, we are given a moment of more direct emotional connection as Simba screams for his father…
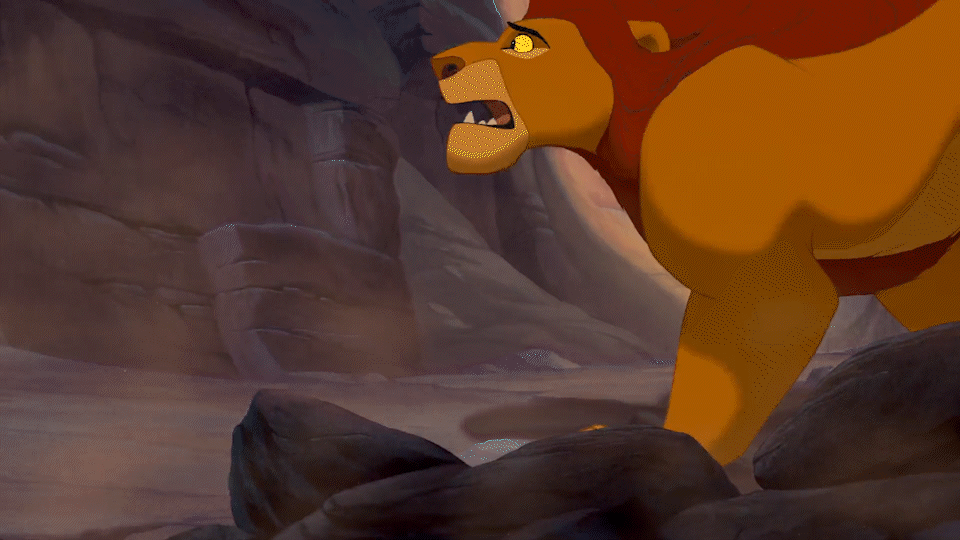
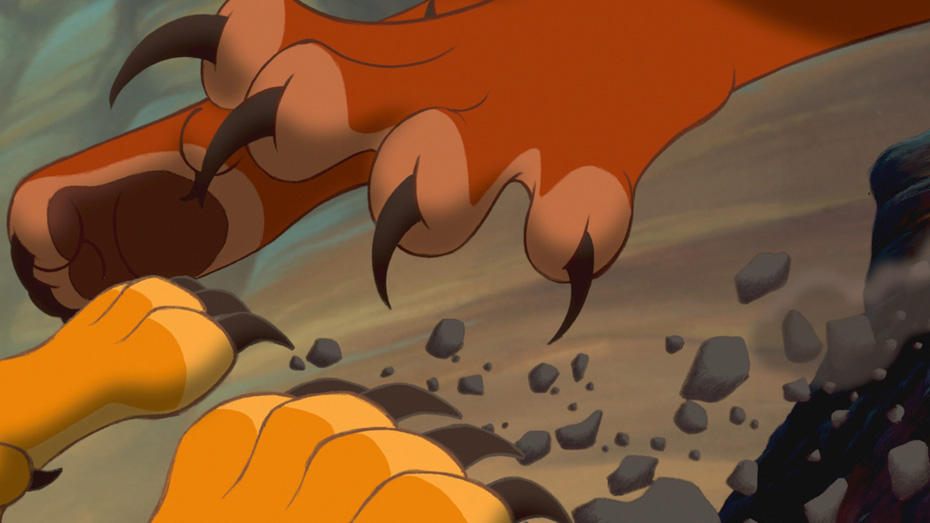
Shot 63: Mufasa crashes to the earth, and the wildebeests continue to stampede from right to left.
Shot 64: Simba searches for Mufasa…
Shot 65: …as the stampede moves from left to right (notice the switch of directions again?). Mufasa is nowhere to be seen.
Shot 66: We punch into a close-up as Simba’s search gets more frenetic.

Back to Shot 65: And with the repetition of SHOT 64, we fear the worst for Mufasa. The tension ratcheted up even further.
Shot 67: We punch in even closer as the horror washes over Simba…
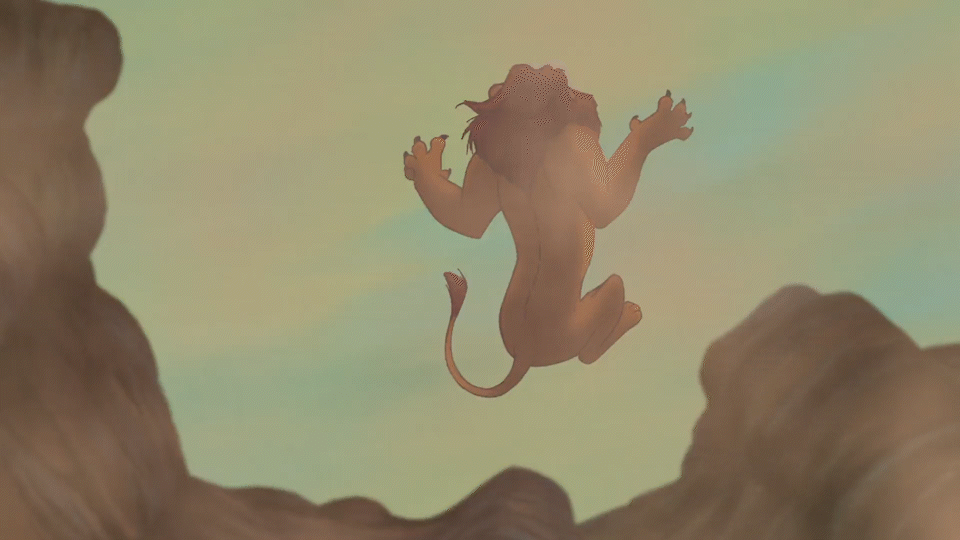
Shot 68: …before at last, we see Mufasa leap out of the frame. Again, a moment of extreme tension punctuated by intense cathartic release.
Shot 69: We finally get a glimpse of the blue sky as Mufasa leaps heroically through the frame…
Shot 70: … And crashes violently into the side of the cliffs.
Shot 71: By punching out from the close up in SHOT 66, the filmmakers allow us a sigh of relief alongside Simba. SHOT 70 is almost identical to SHOT 61, but with a tiny glimpse of the sky in the top right of the frame. A bit of hope that our heroes may get out of this ordeal alive?
Shot 72: Mufasa is silhouetted against the sky as Simba watches him scale the cliffs. As he turns to climb up the rocks himself, the camera pans right, and all of a sudden, the sky has been just about taken out of the frame. Our hope is going to be shortly-lived.
PART 6 – “LONG LIVE THE KING”
Shot 73: The set-up work done at the top of the scene showing us the sheer number of wildebeests helps sell the audience that the stampede would still be going at full tilt. For the first time in this scene, we see Mufasa from a high angle shot, as the stampede rages below. That can only mean one thing: he is looking at Scar.
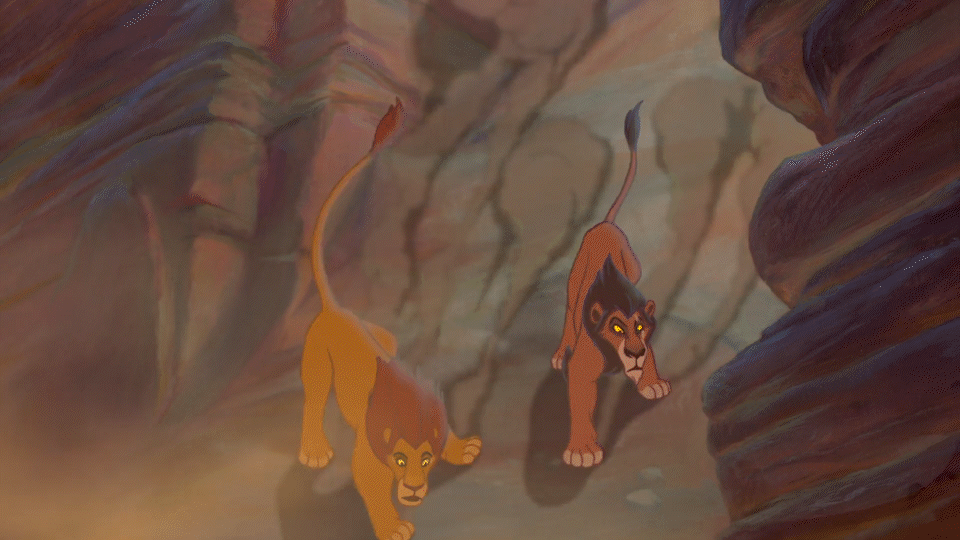
Shot 74: Scar is framed in the right of frame in a low-angle shot. SHOTS 73 and 74 recall the compositions of SHOTS 21 and 22, but the roles are now reversed. With the sky behind him, we intuitively understand that Scar is the gatekeeper to Mufasa’s safety.

Back to Shot 73: Mufasa slides down the cliff, and we understand just how tenuously he is holding on.
Shot 75: By cutting to a wide shot, the filmmakers very clearly establish the new power dynamic between Scar and Mufasa (Scar is on top against his brother for the very first time). But they also show us how close Mufasa is to safety, and how easily Scar could help him.
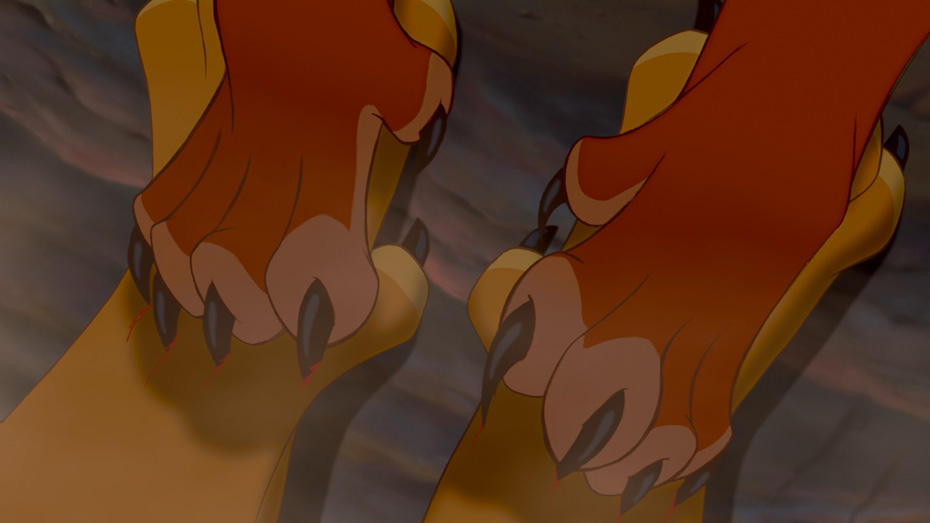
Shot 76: A cut to a close-up of Mufasa’s feet scrambling shows how weak his grip is…
Shot 77: …and a shot of the rocks tumbling down into the gorge shows that certain death awaits if he falls.
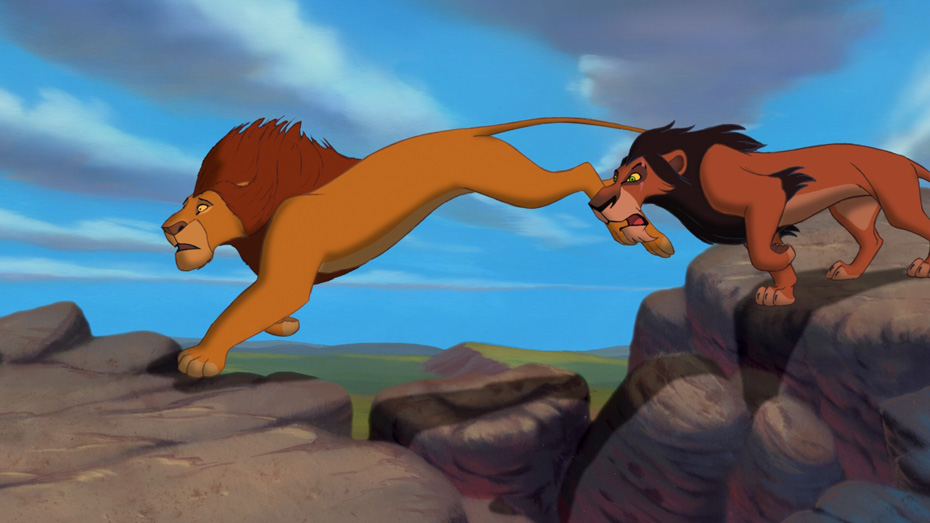
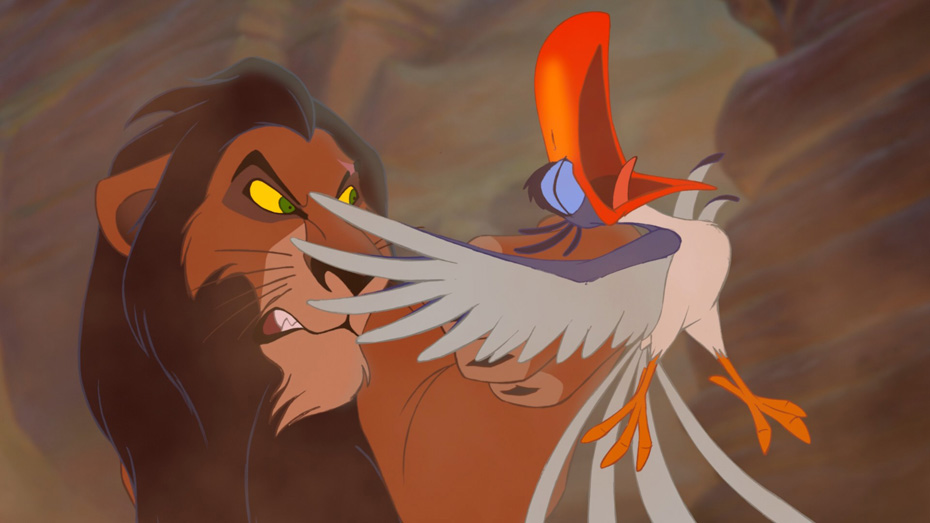
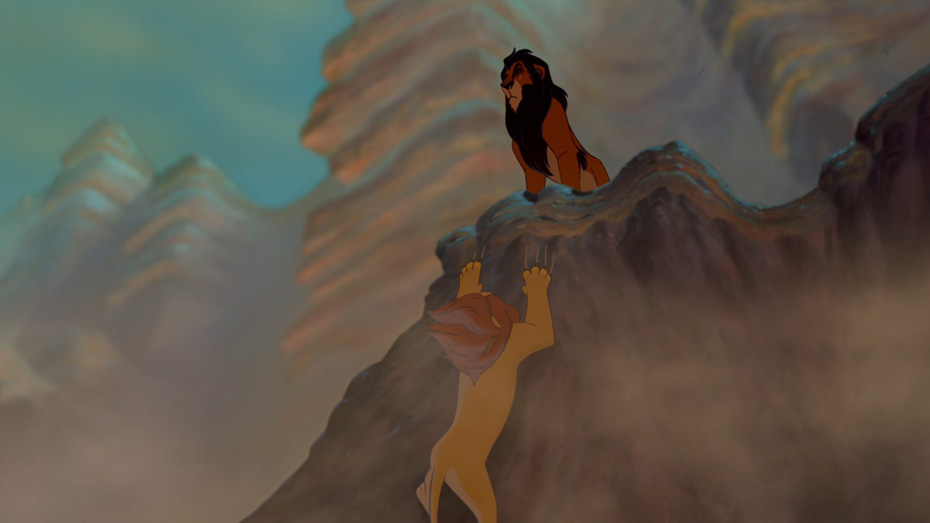
Shot 78: Scar has a decision to make, and leaps down violently out of the frame…
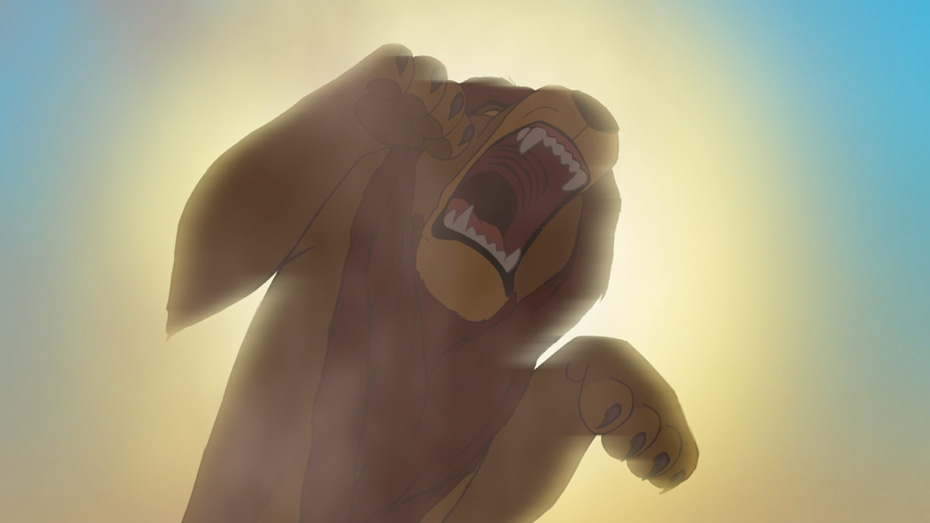
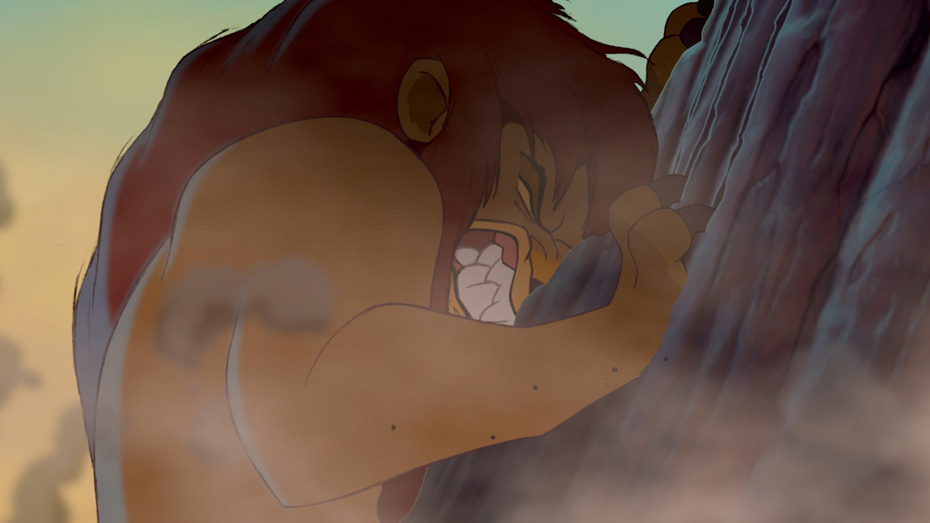
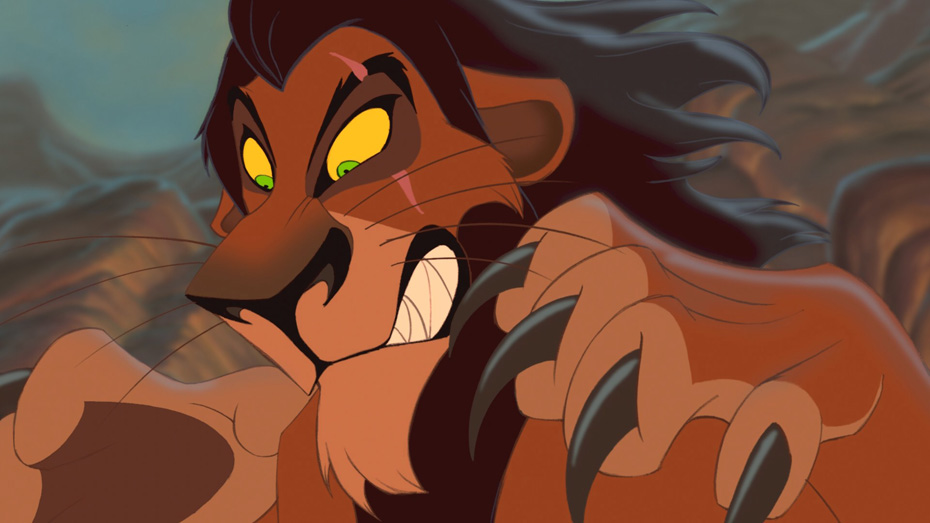
Shot 79: …burying his claws deep into Mufasa’s…
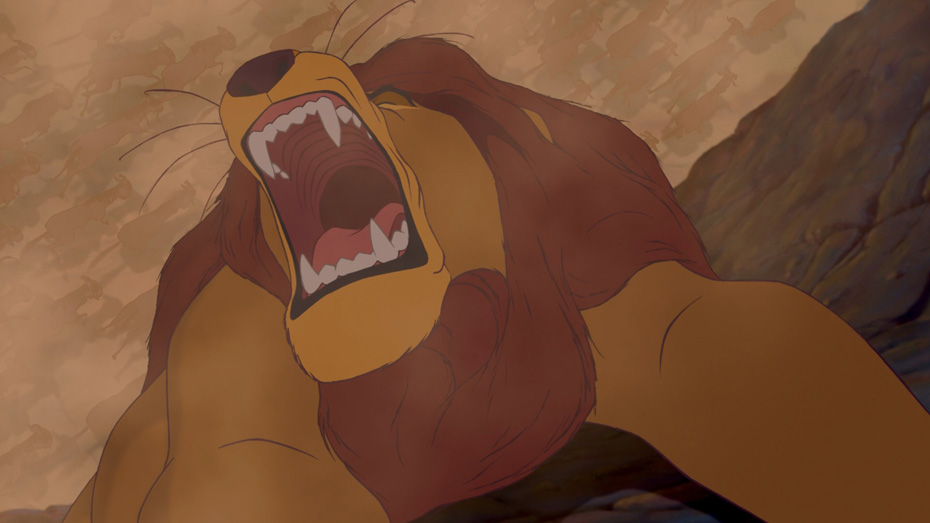
Shot 80: …who roars in pain.
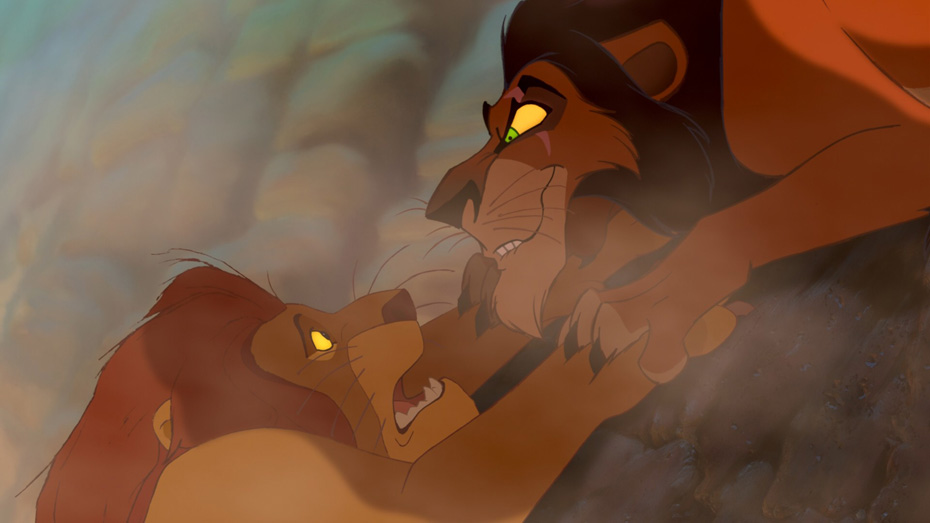
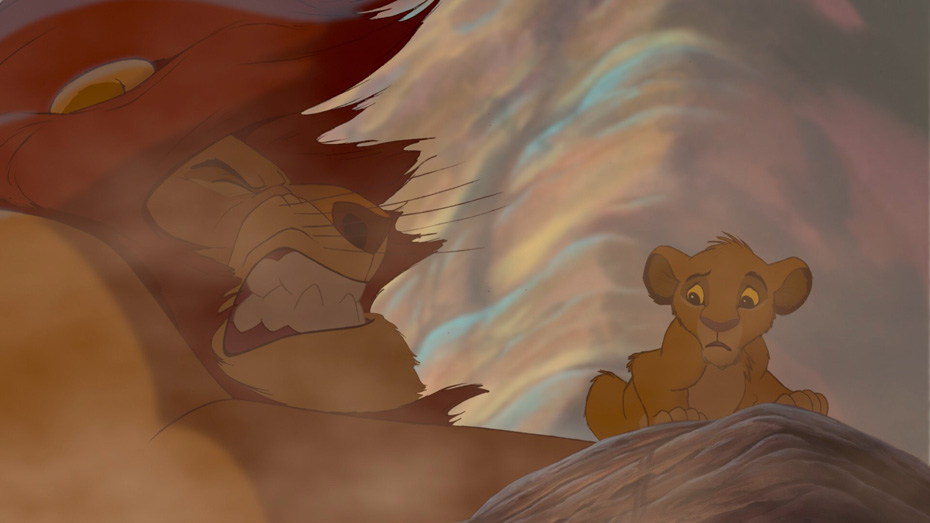
Shot 81: In another iconic shot, Scar leans down. The sky is gone from the frame, as is Mufasa’s hope. The power dynamic is clear to see, and the outcome feels all but certain as Scar utters the famous line “Long live the King.”

Shot 82: We cut to the tightest closeup of the sequence as Mufasa and the audience realize in real time what is about to happen.
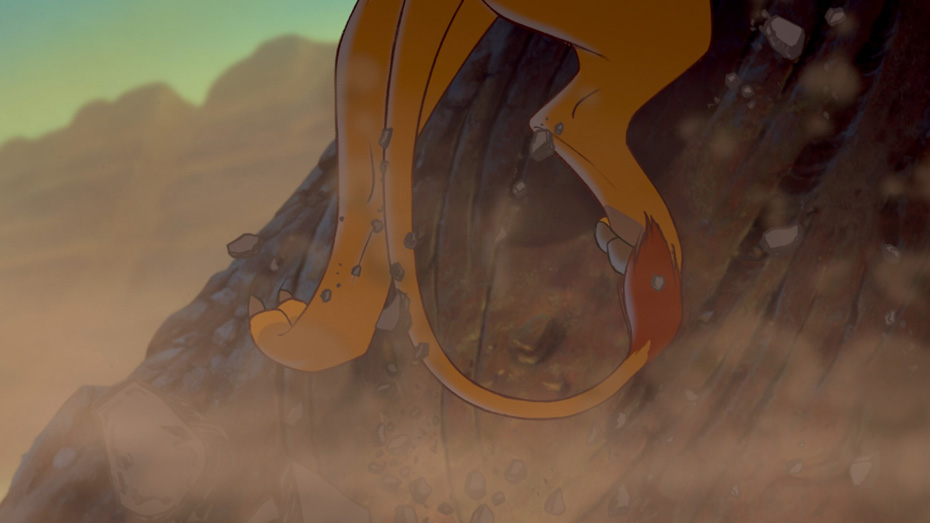
Shot 83: In a slight reframing of SHOT 78, we see Scar rip Mufasa’s hands off the cliff.
Shot 84: From the bottom of the gorge looking up, Mufasa falls. Away from safety and into the camera, obscuring the blue sky.

Shot 85: The reverse shot shows Mufasa falling to his death.
Shot 86: The cross-fade matched with the zoom-out from the extreme close-up of Simba’s eye tells us that Simba is watching his father fall to his death. The zoom out ends in a wide shot of Simba in the cliffs, with no sky around him: a helpless witness to his father’s death. A final punctuating moment of extreme tension, but one ending in tragedy rather than cathartic relief.
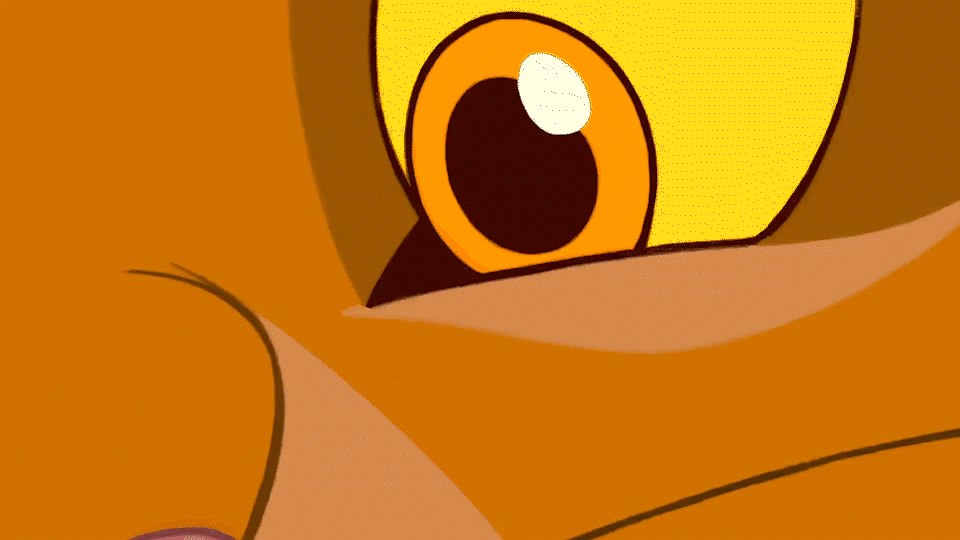
It’s no surprise that the 2019 remake of The Lion King featured an almost shot-for-shot recreation of this stampede scene. With such thoughtful control of screen direction, cross-cutting and color design, this scene can be used as a reference for anyone looking to build a chase scene, build tension and add dynamism to a film’s most emotional moments. Animation affords the unique opportunity to see a film where every detail of a frame had to be constructed from scratch. We hope that this iconic scene will help you see how these little details can make a cinematic moment carry through generations!